
Using Historical Maps While Mapping Novels
Genre of text: novels
Course level: beginner
Student difficulty: low to moderate
Teacher Preparation: low
Semester time: anytime
Estimated time: ~1 hour prior to each class, 55 minutes in class
Learning Objectives:
- Students will learn about GIS tools including Map Warper.
- Students will begin to develop basic skills for engaging historical maps.
- Students will learn about techniques to promote deeper understanding of a text.
Teachers note: This is the second portion of a recommended two-part lesson but can stand on its own. This lesson's data set is drawn from Wilkie Collins’ novel Armadale, which takes place predominately in the United Kingdom, but the text spans the Atlantic. Collin's originally published as a serial between 1864-1866. Neither the students nor the professor need to be familiar with the novel for the lesson to be effective! The goal is to familiarize the students with ArcGIS and to walk them through what mapping the locations of a novel looks like.
Lesson Documents:
- Wilkie Collins' Armadale: A Novel (New York: Harper, 1874) on Internet Archive.
- Google Slide Deck for Lesson (link) --> Recommend copying and modifying to teacher's preferences
- Google Sheet with list of locations from Armadale for lesson (link) for student use --> copy for each new class.
Lesson 1:
Time: 55 min
- Tell the students that this lesson [is intended to follow the first lesson. It] involves learning about another layer of ArcGIS (literally!)- the tile image layer. Today, we show students how they can take a historical map, rectify it so that the borders lay correctly over the contemporary base map they are using, and bring it into ArcGIS.
- Bring the students to the David Rumsey map website (https://www.davidrumsey.com/). This website is a repository of old maps available for use. Show them how they can browse and filter. Then, go to the following map, which you will use as a demonstration today.
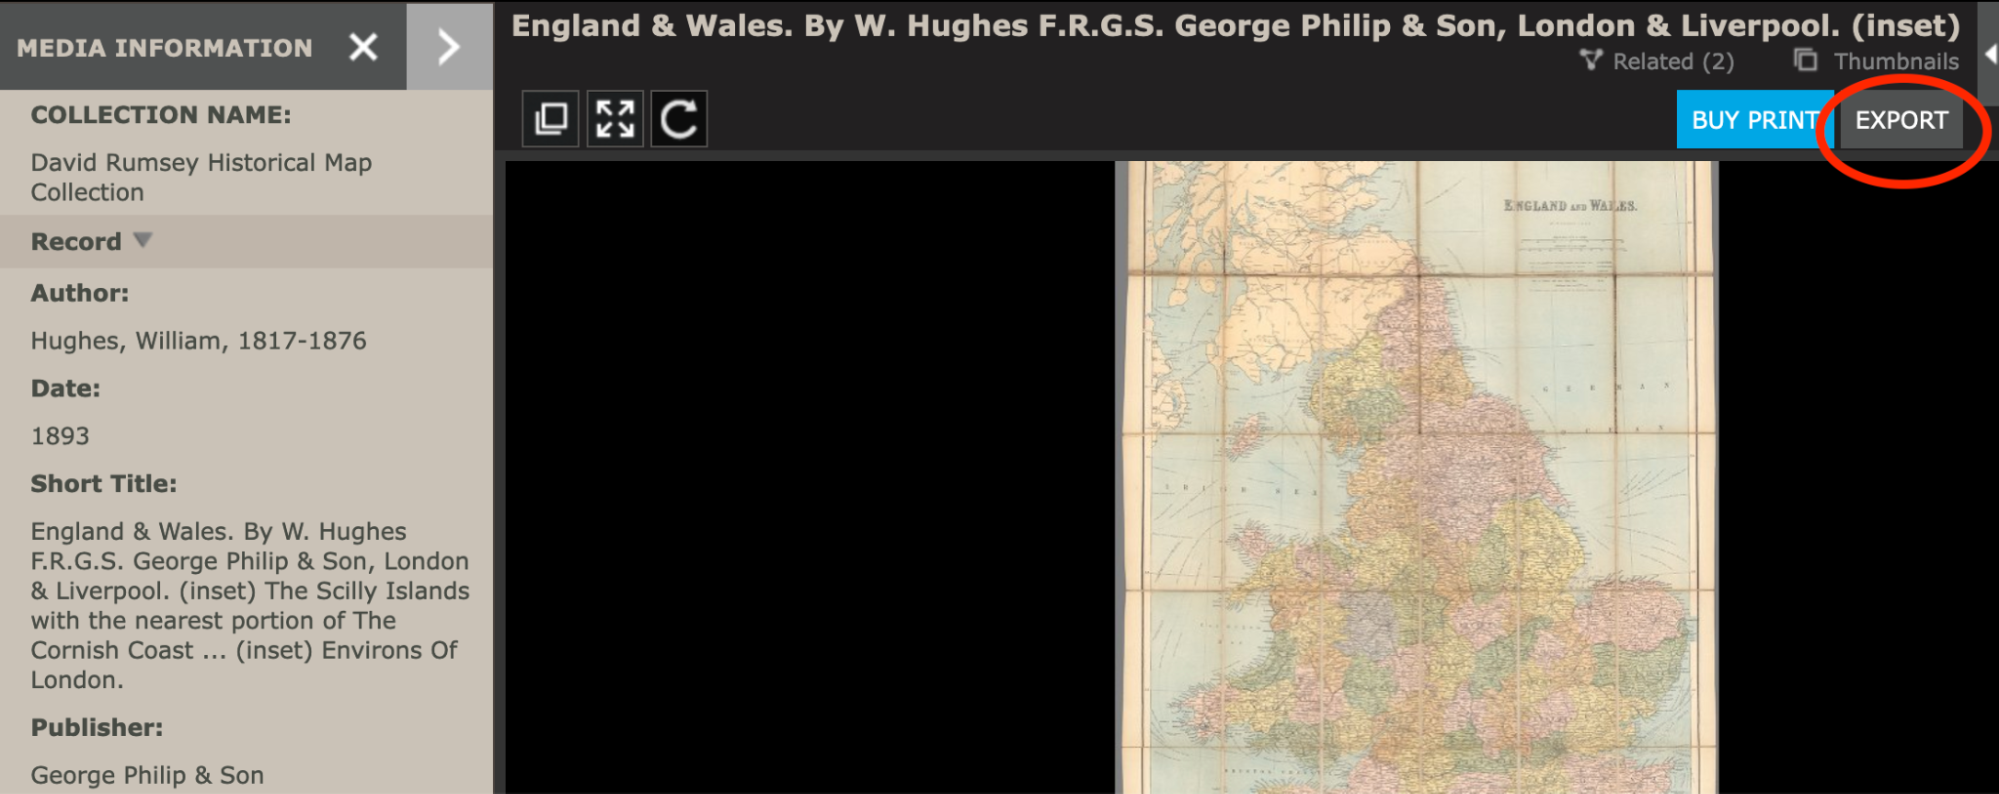
- Show the following map and tell students that "This is an 1893 map of England and Wales." Map: https://www.davidrumsey.com/luna/servlet/detail/RUMSEY~8~1~350186~90117574:England-%26-Wales--By-W--Hughes-F-R-G?sort=pub_list_no_initialsort&qvq=w4s:/where%2FEngland;q:england;sort:pub_list_no_initialsort;lc:RUMSEY~8~1&mi=0&trs=4041#
- Walk them through moving this to Mapwarper, where you will rectify the map.
- Within David Rumsey's map view, In the top right, click "Export."
- Tell the student: When you are making their own map, they should try choosing perhaps the second largest size and go from there. If it is too large, they can choose a smaller one. If it is not precise enough, they can choose a larger one.
- For the purposes of this lesson, select medium or large, just so that it will not take too long to export.
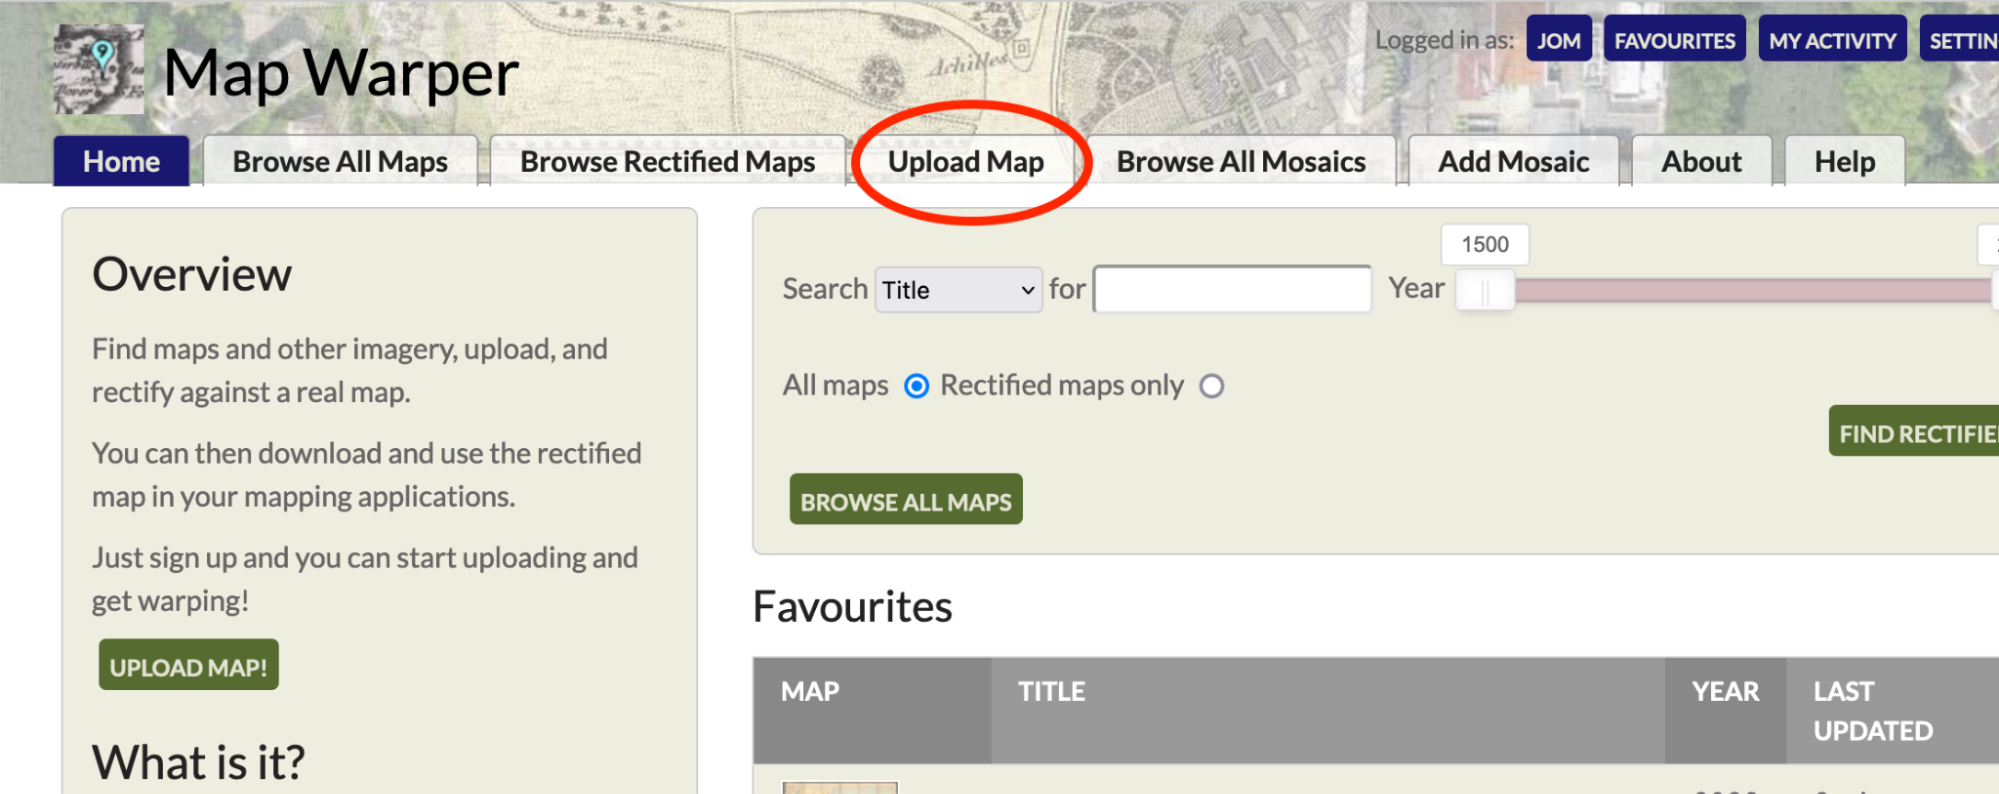
- Go to Map Warper ( https://mapwarper.net/ ). You will have set up your account before this.
- Click on “upload map.”
- Give the map a basic title, and enter some basic identifying information. For example:
- Date: 1893
- Publisher: George Philip & Son
- Then, under “Upload An Image File,” select “browse,” and upload your image. You should see a page that says “Map was successfully created.”
- *Test out all of these steps before you teach the lesson, and save your test map in mapwarper. If something goes wrong in the process of exporting from the David Rumsey collection to Mapwarper, you can tell the students that this happens sometimes and they can troubleshoot when this happens. Then, you can proceed with the lesson by using your saved test map to demonstrate how to rectify.
- Now that you have your map, you can begin rectifying. Select the “rectify” tab.
- Navigate on the contemporary geographical map so that you are focusing on the same location as your historical map. Now, you can begin rectifying.
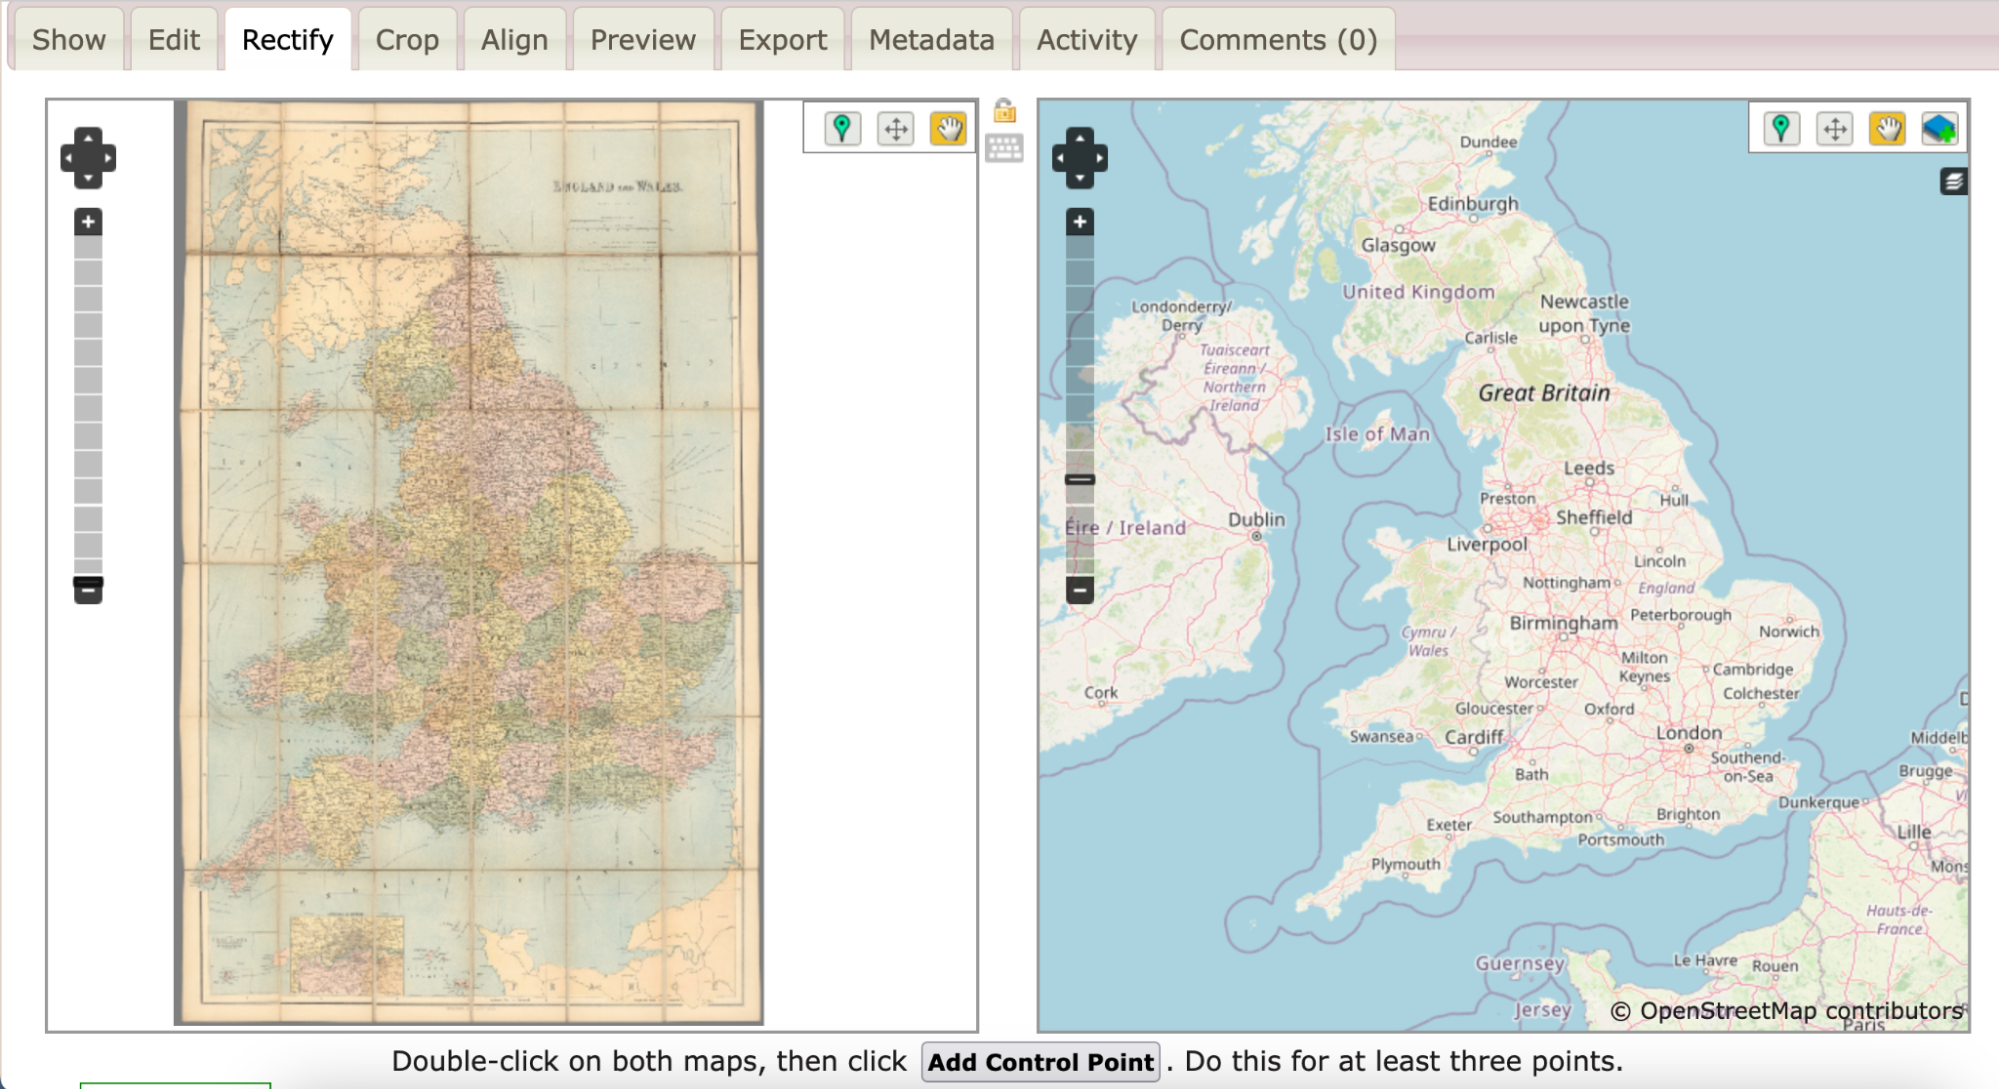
- Select a common point to begin with- for example, for this scale, London. Select the green pin tool, and drop a pin on London in both maps, using the zoom features to place it precisely. Then click “Add Control Point”.
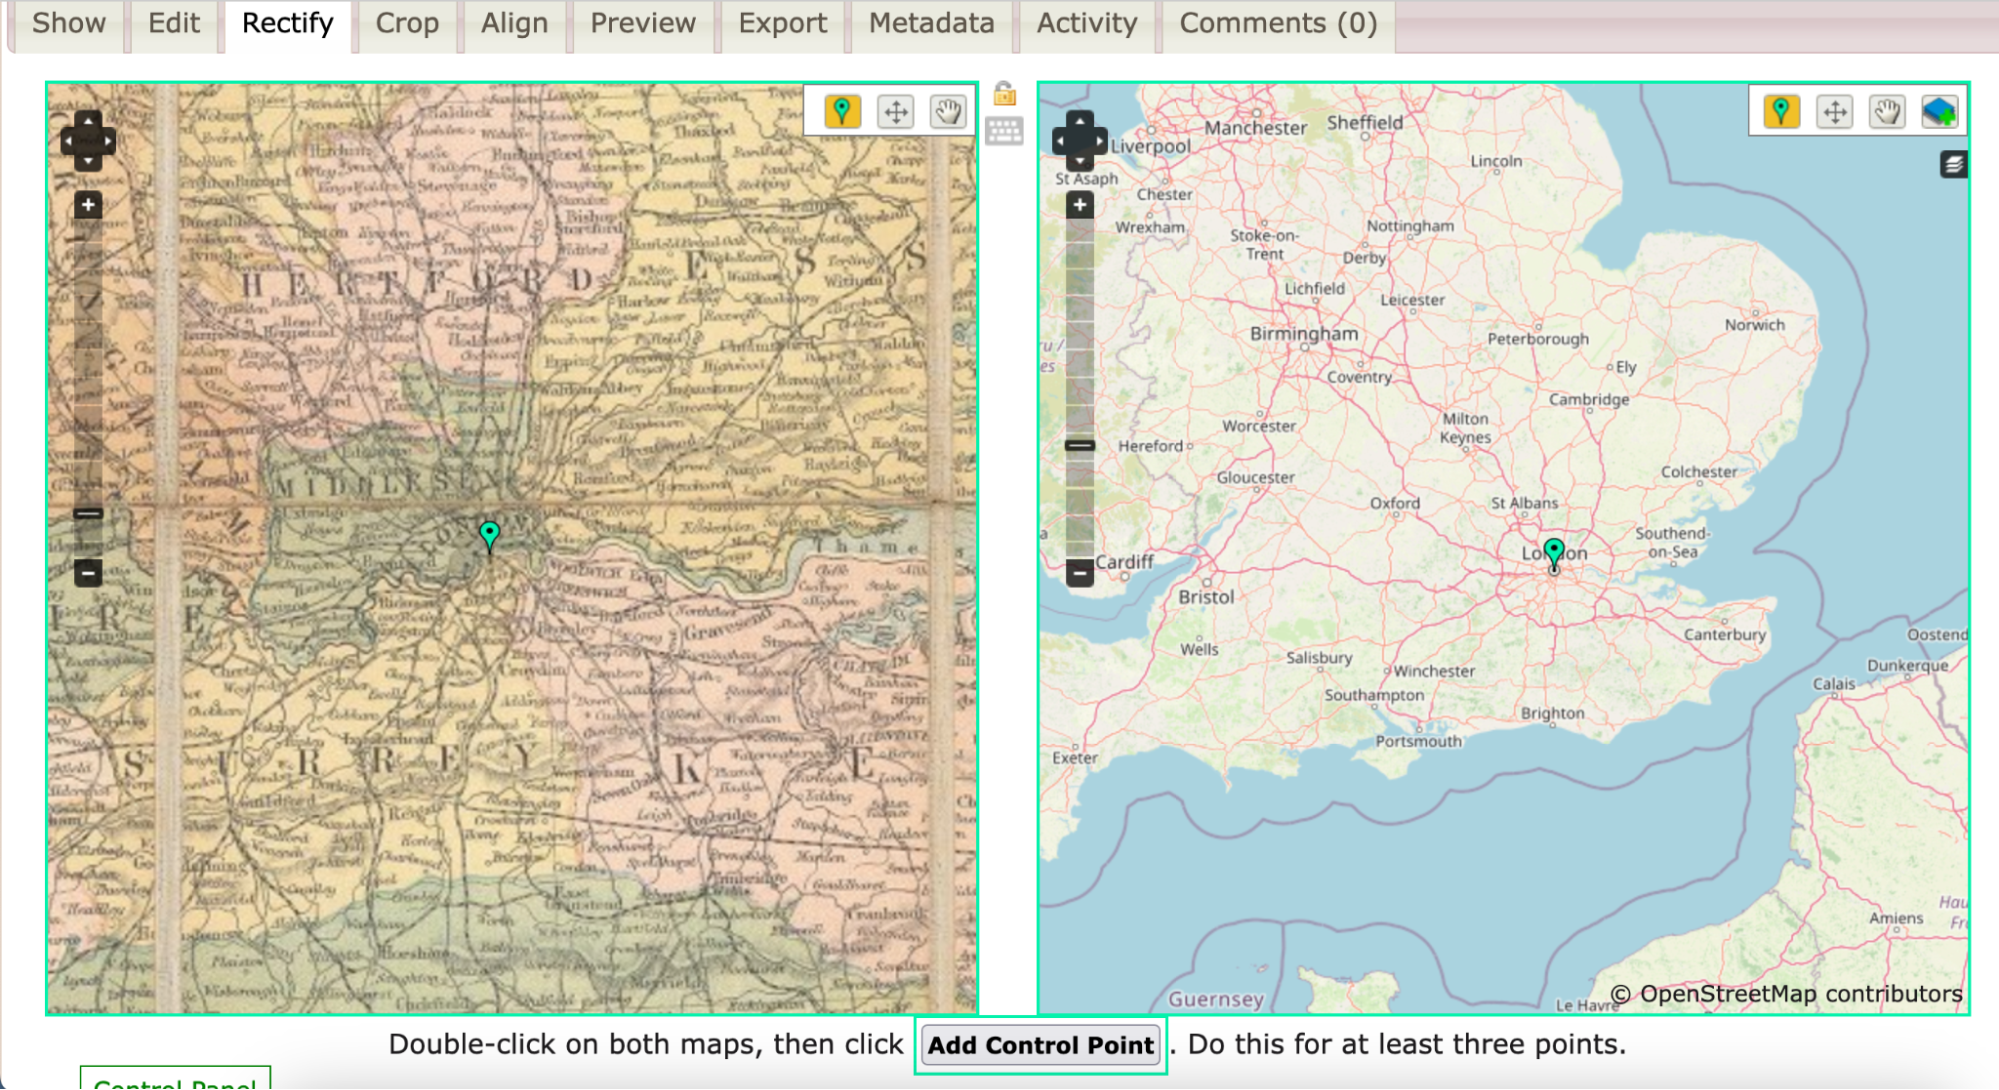
- Again, this will not be perfect because your map quality might be a little blurry here for the sake of keeping the lesson moving. This is alright! You just want to show the students the general idea of this so that they can do it for themselves. Choose two other points to rectify. Tell students that they will do more than this when they rectify their own map.
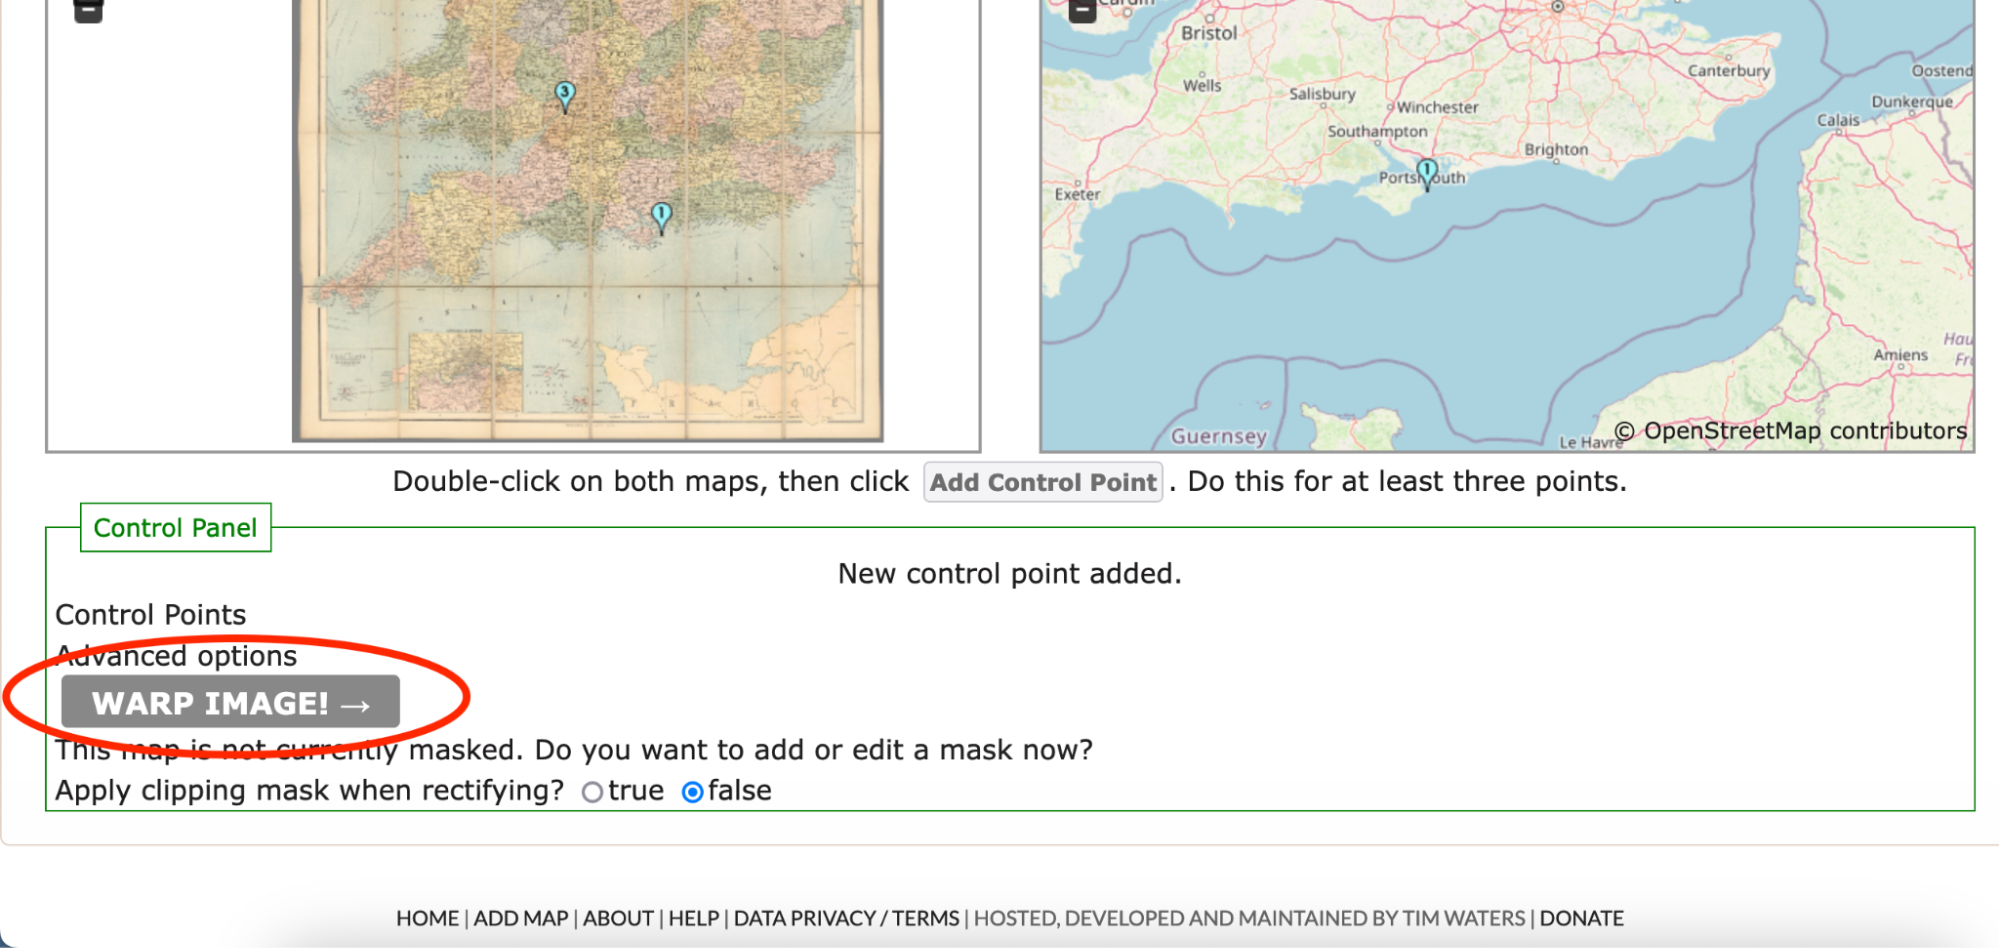
- When you have rectified three points, you can now demonstrate to the students how they export a map to ArcGIS. Scroll to the bottom of the page, and click “WARP IMAGE!”. This applies the rectifying process you have just been doing, making the historical map fit the contemporary one.
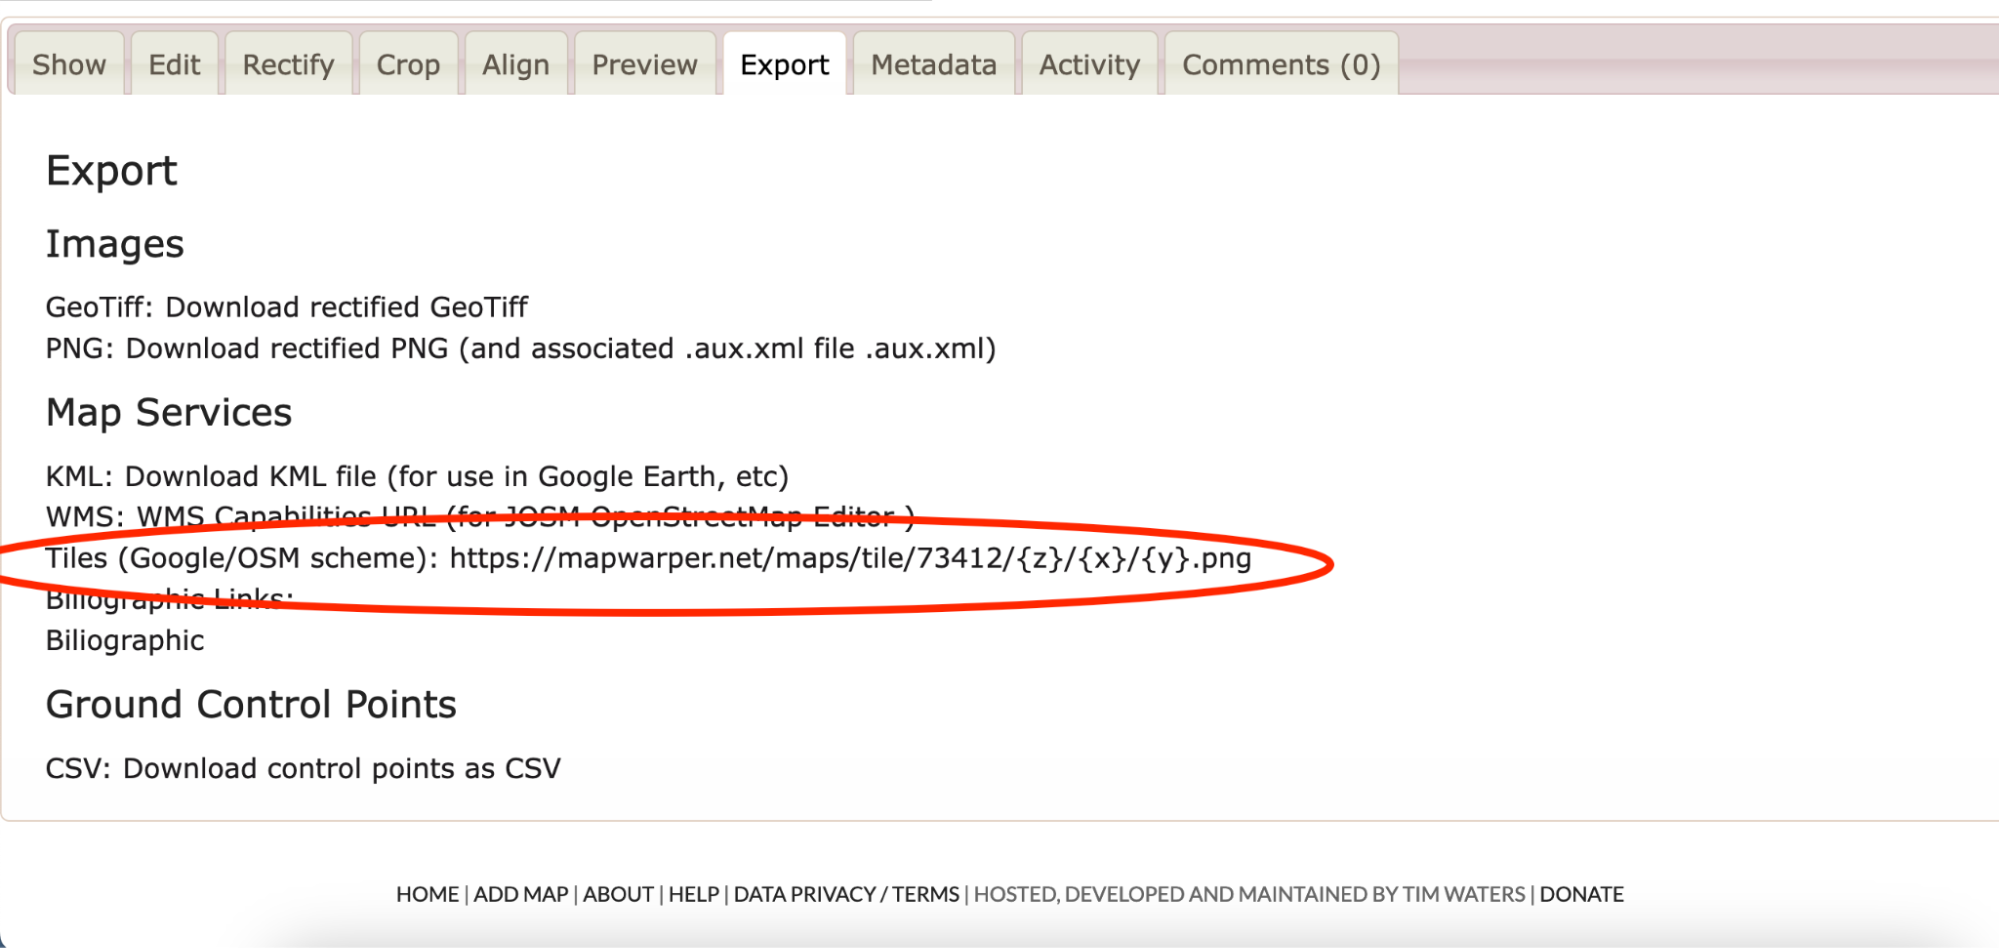
- Now, you are reading to bring your rectified map into ArcGIS.* Navigate to the “Export” tab. Copy the “Tiles (Google/OSM scheme)” url.
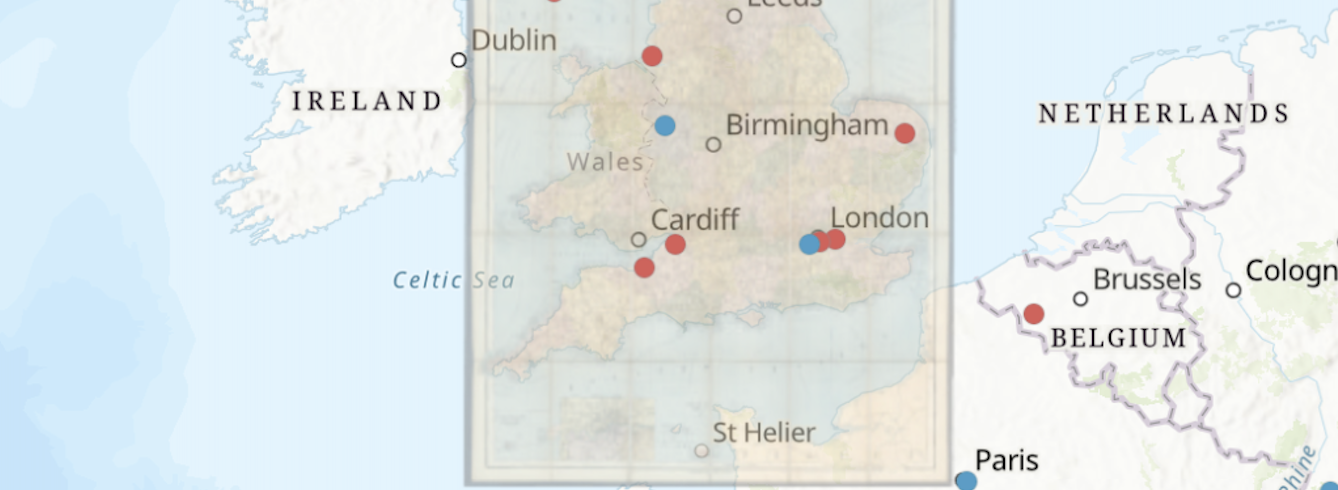
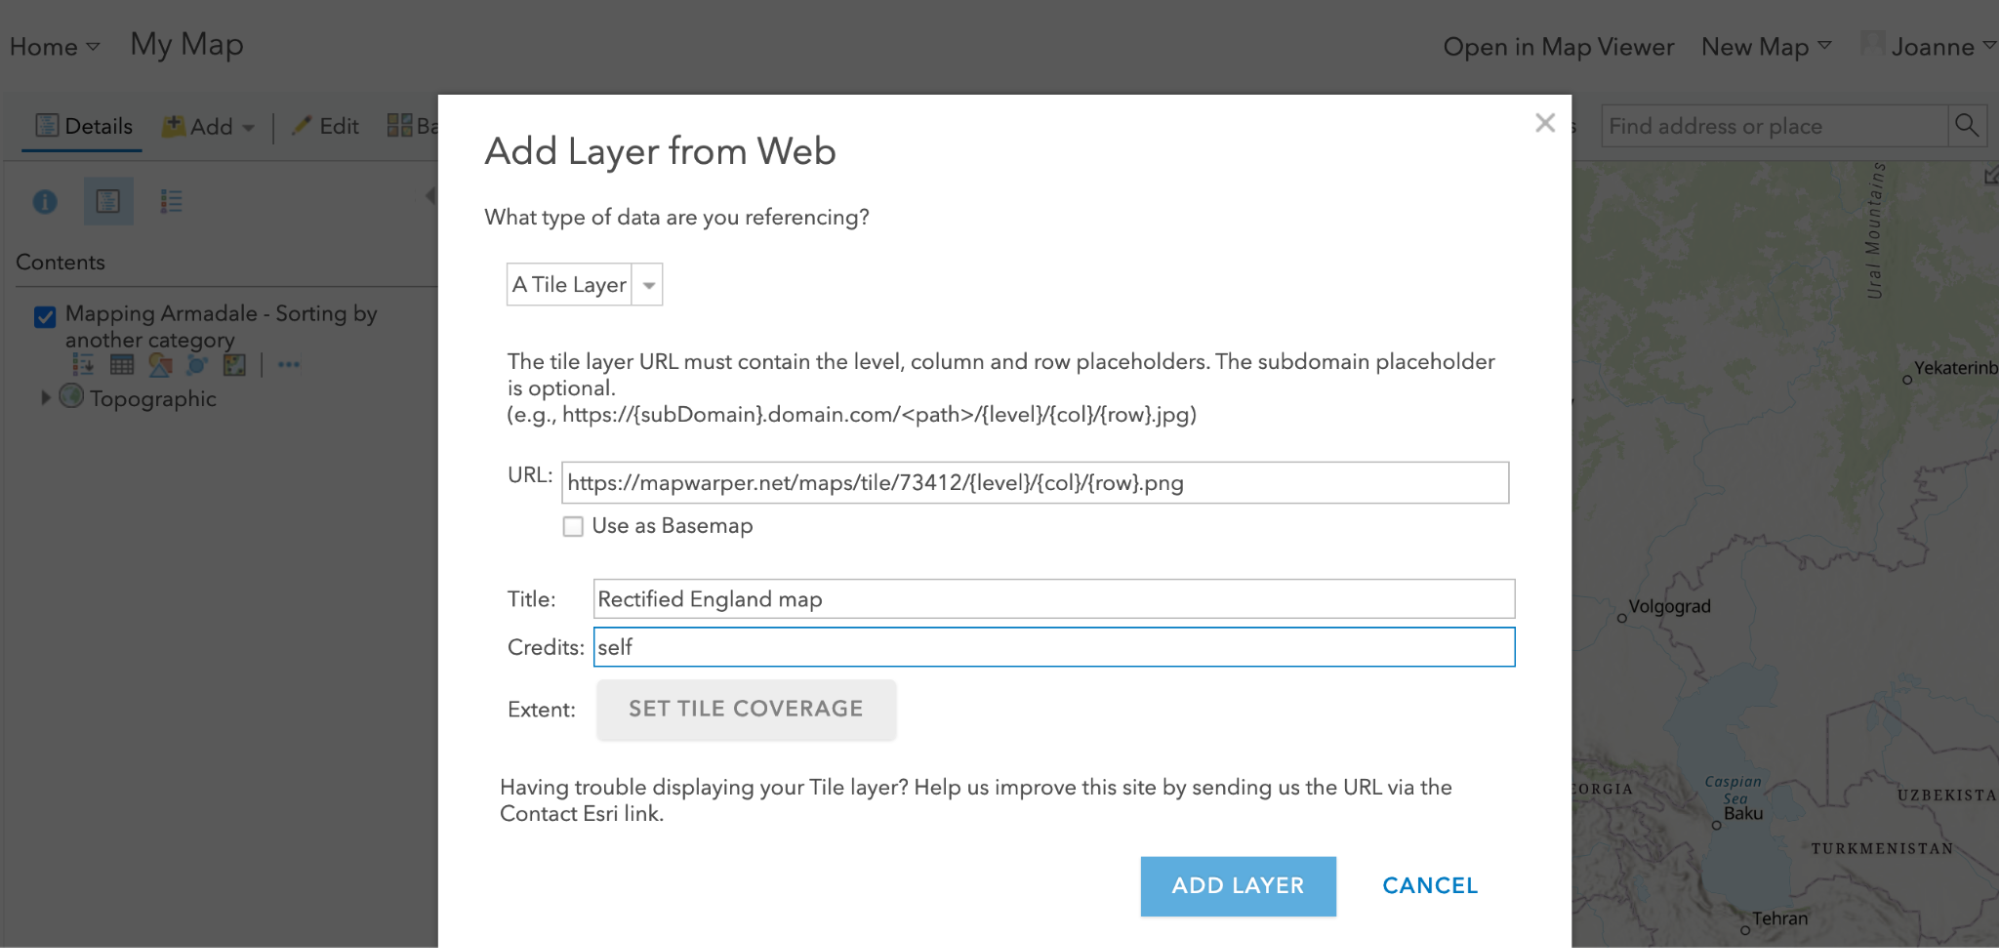
- Go back to ArgGIS. Pull up your map from last time with the data points from Armadale. Complete the following series of commands:
Go to “Add” → “Add Layer from Web” →
Make sure under “What type of data are you referencing?” that you select “A Tile Layer” - Paste the URL from Mapwarper into the URL box. Replace the lines “{z}/{x}/{y}” with “{level}/{col}/{row}”
- Give the layer a title and credit the source, then click add layer:
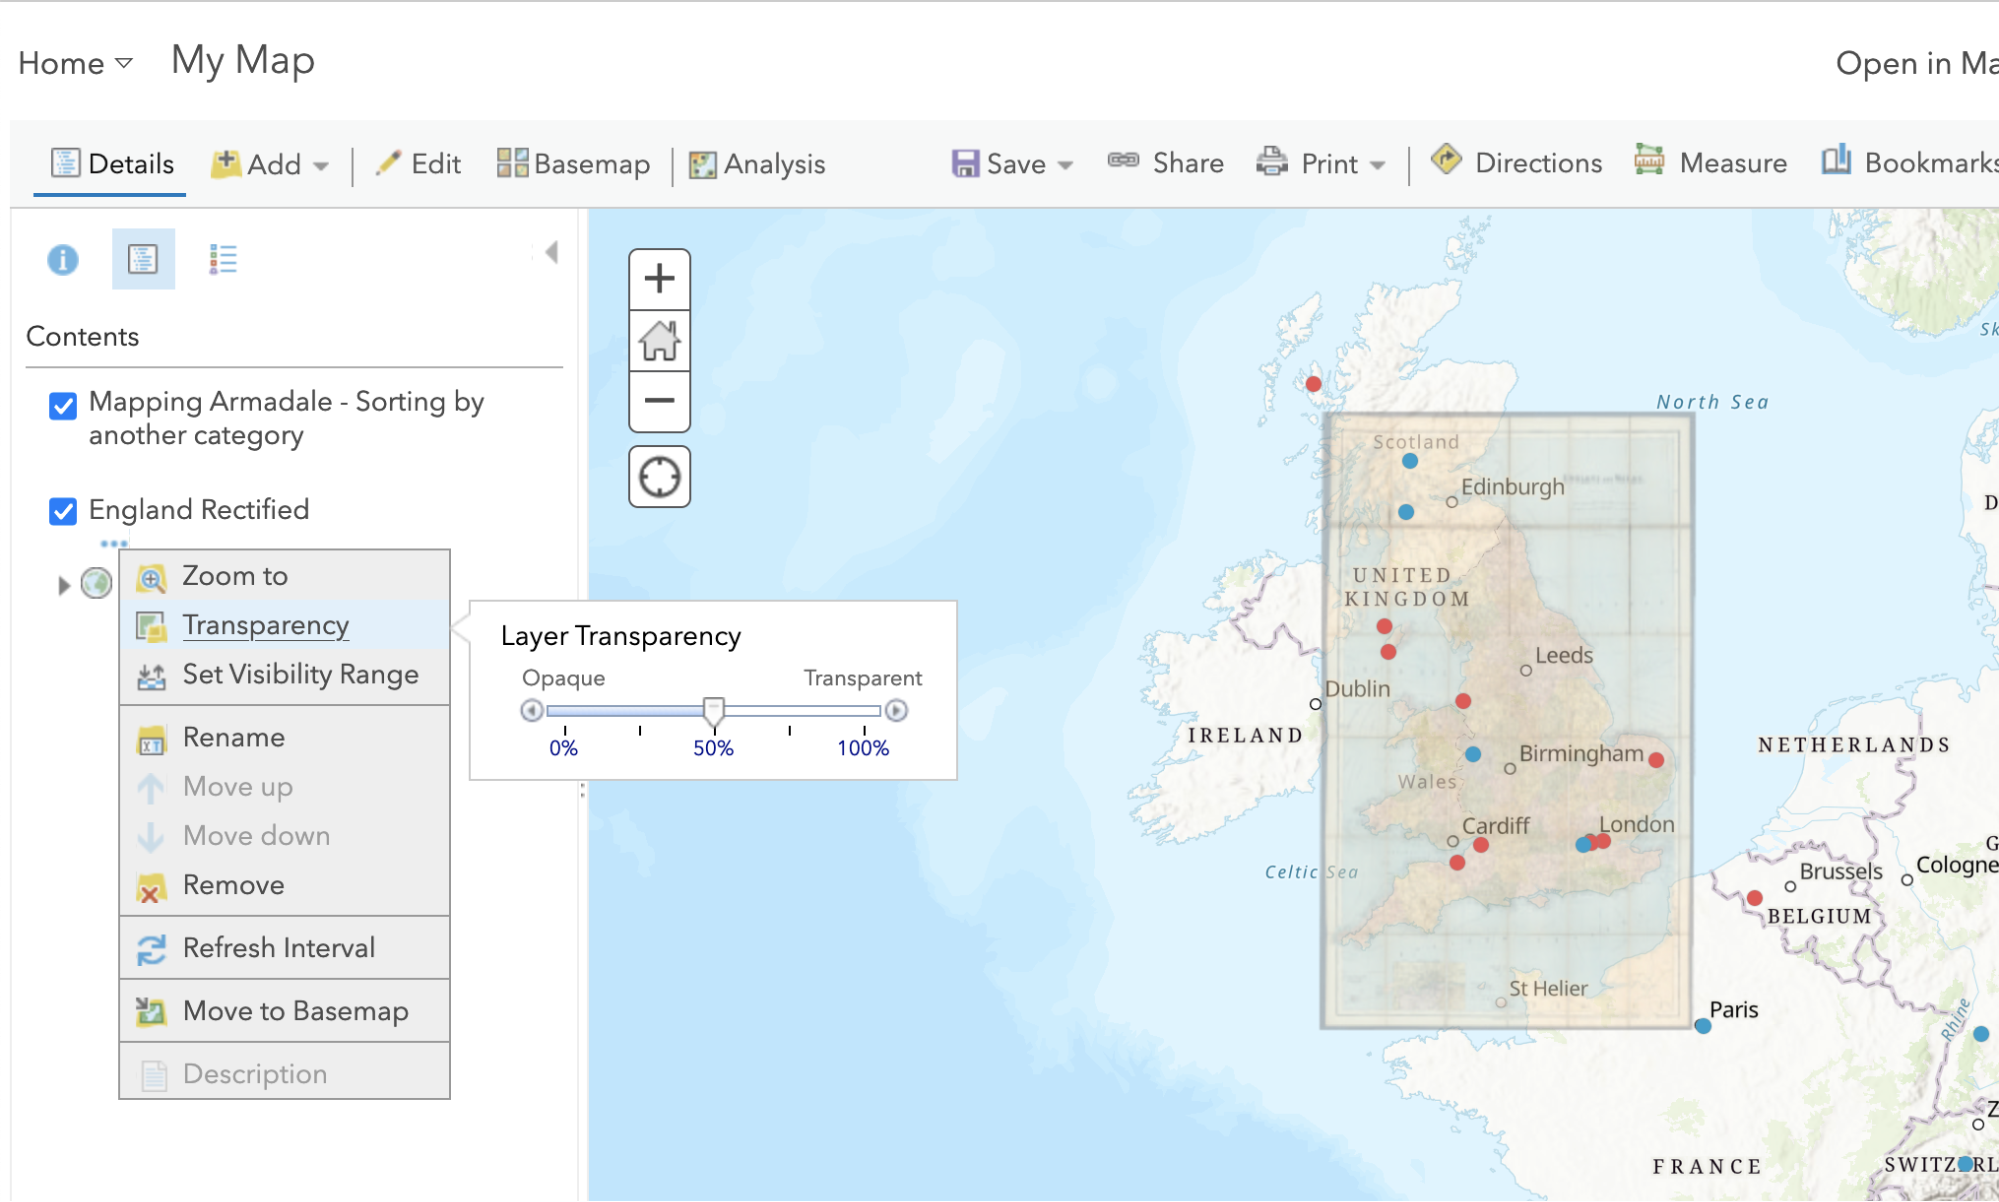
- Your rectified map should now be successfully overlaid in a layer over the basemap in ArcGIS. You can edit the transparency of this layer.
- In the time remaining, have the students go to Mapwarper, make an account, choose a map, and begin playing around with it. Depending on how much time is left, you can ask them to rectify the map by adding at least three points, and then to export the map to ArcGIS.
- *Your map may have borders/space around it that you want to remove. If this is the case, do this after you have warped your map and before you export it to ArcGIS. Navigate to the “crop” tab. Highlight everything that you want to keep, and then click “Mask”. Then, follow the same steps to import the map to ArcGIS. You can always undo the masking that you have done if you change your mind.