
Beatle Printing Press Use
Created by Justin Brown-Ramsey, PhD Student
English Department, Boston College
For the Collaborative Digital Projects Lab
Table of Contents:
- Setting Type for a Letter Press
- Arranging the Page
- Using the Press
- How to Clean the Press and Related Materials
- Safety Warnings (Chemicals & Tools)
Instruction Guide for Operating a Printing Press (Letter Press):
Setting Type
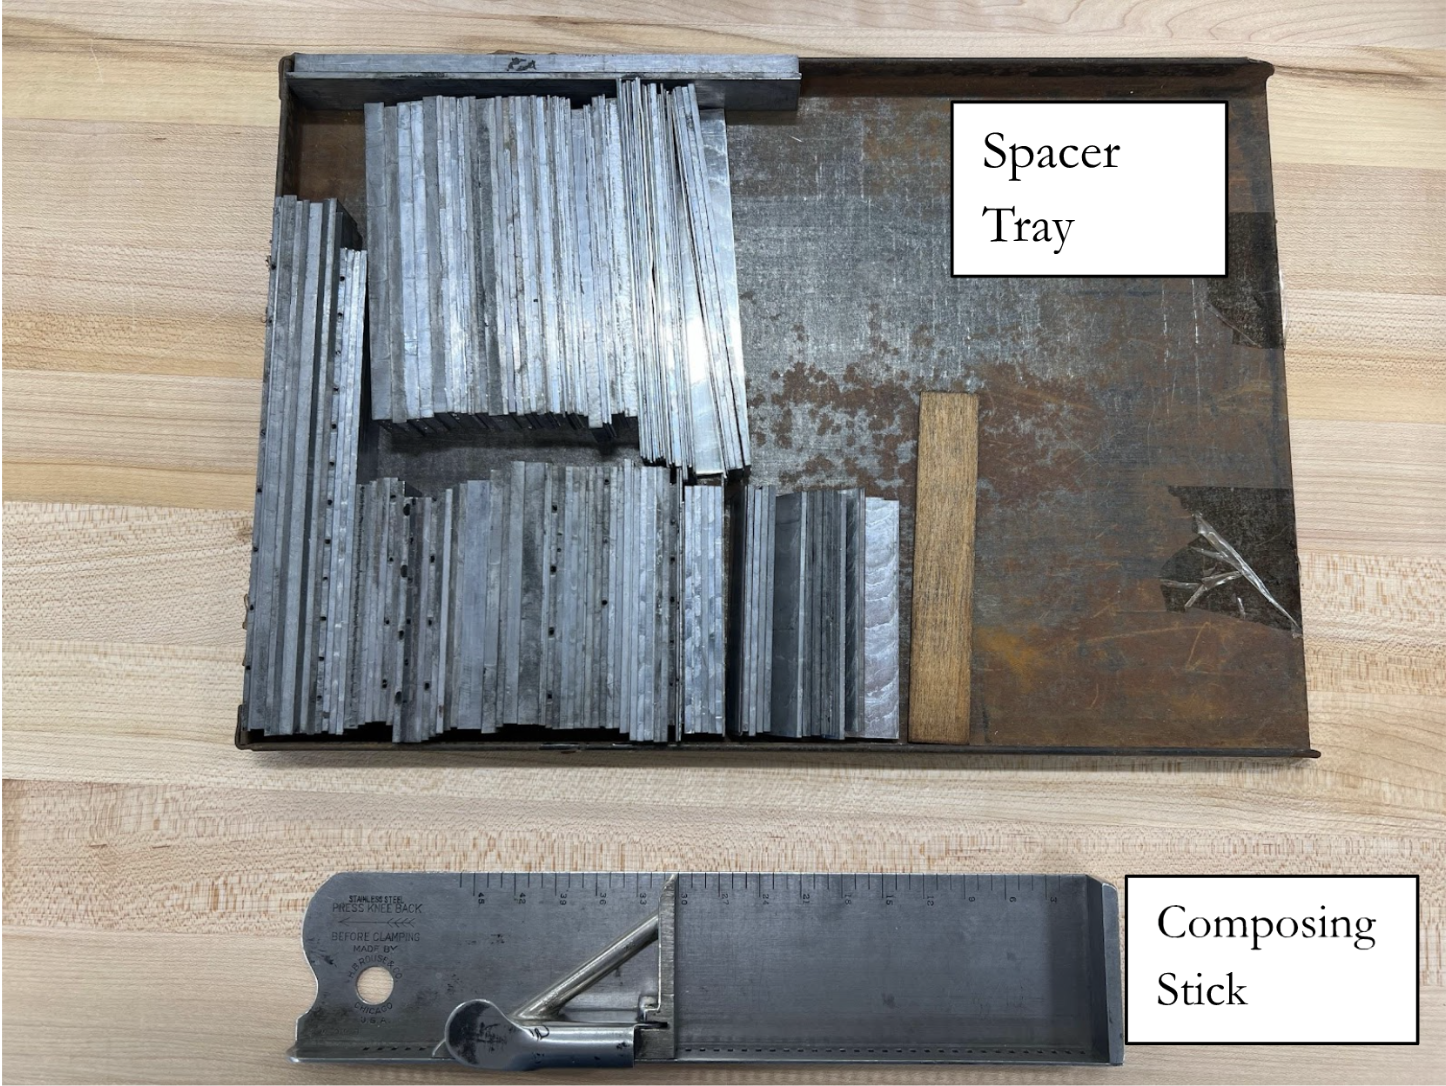
- Locate composing stick, spacer tray, and California job case (YouTube example video)
Justin Brown-Ramsey 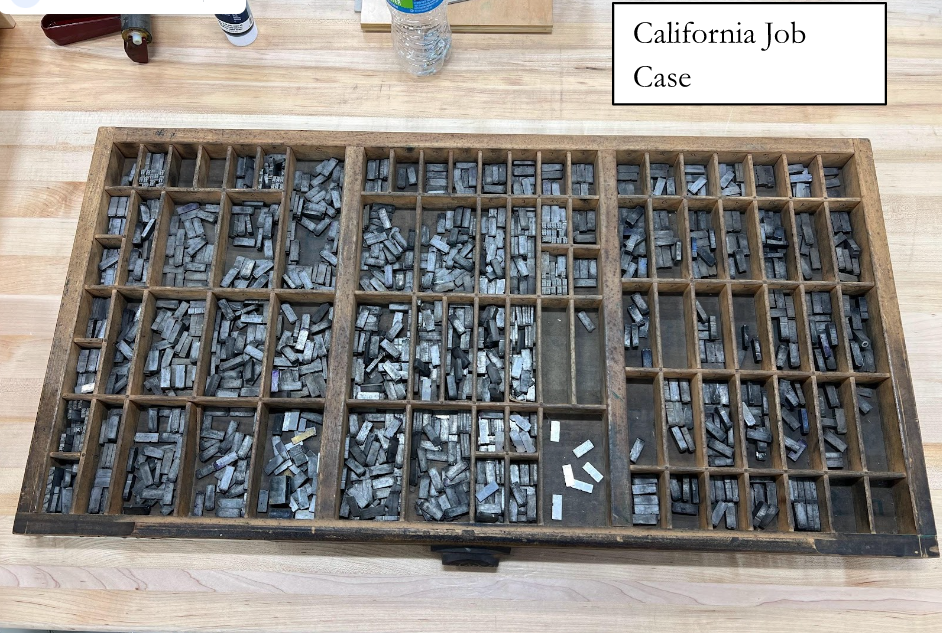
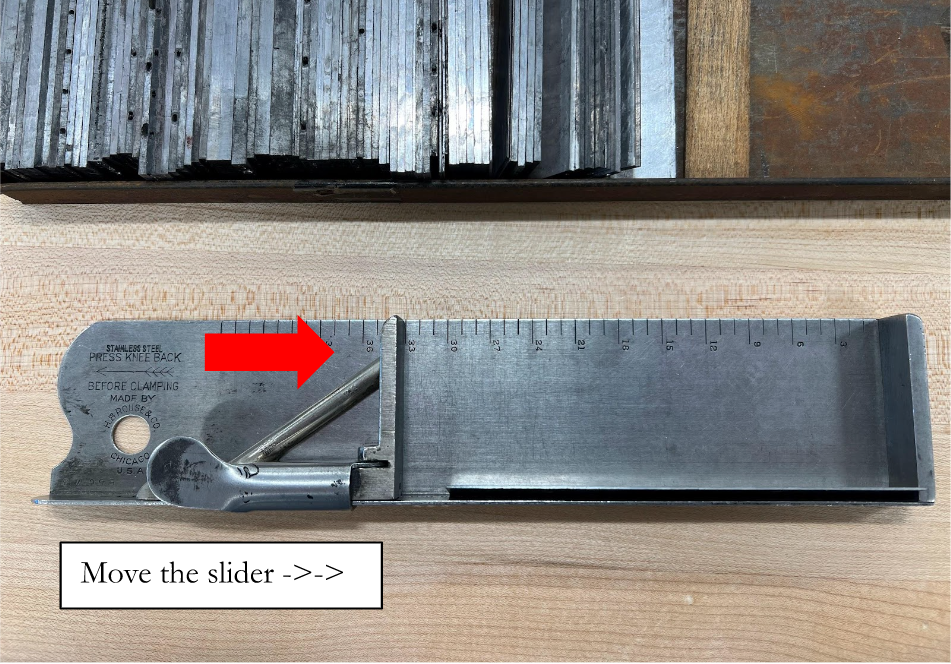
Justin Brown-Ramsey - Choose the desired length of your text line(s) by placing a spacer into the composing stick (YouTube video)
Justin Brown-Ramsey 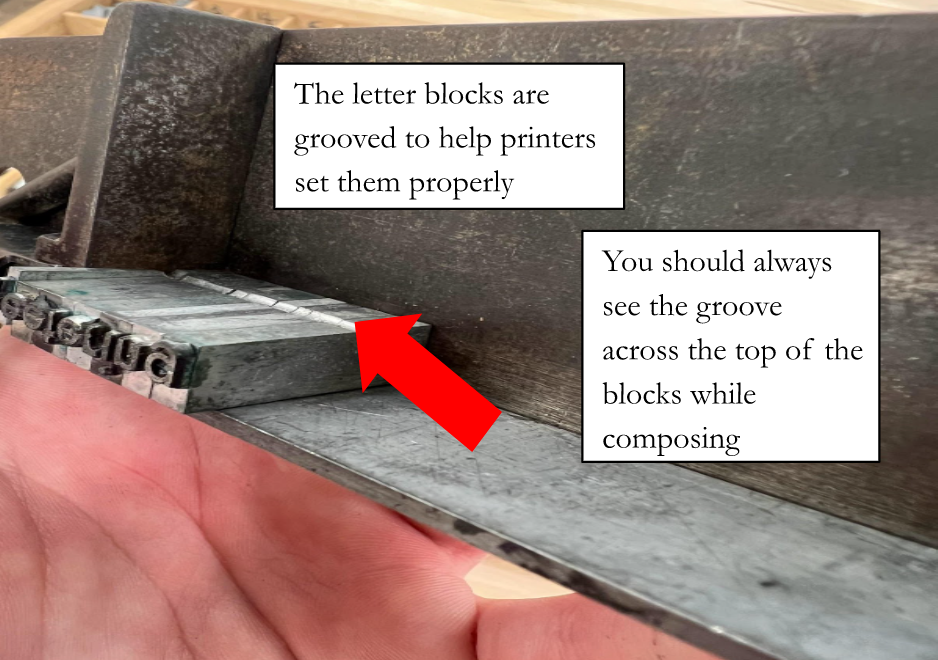
Tip: Make sure your letters are aligned with the groove on the type block facing up. | Justin Brown-Ramsey - Move the slider on the composing stick to meet the spacer length (lift up small handle to free the slider, press down handle to secure slider)
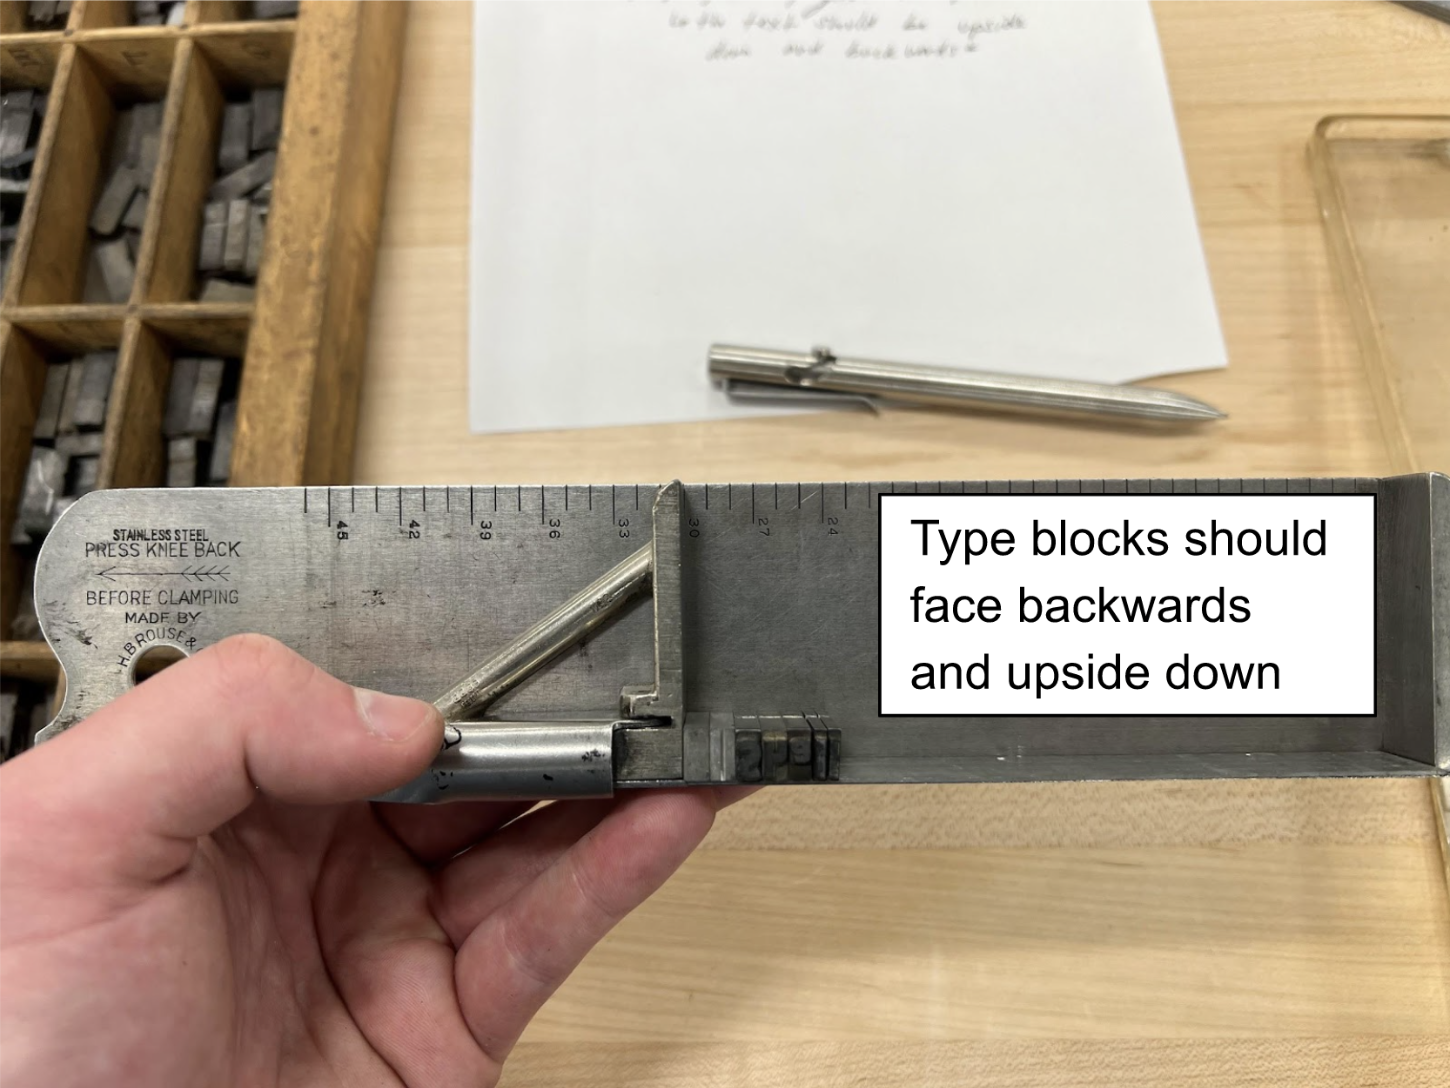
- Begin removing letters from the California job case and placing them into the composing stick (YouTube video on how to)
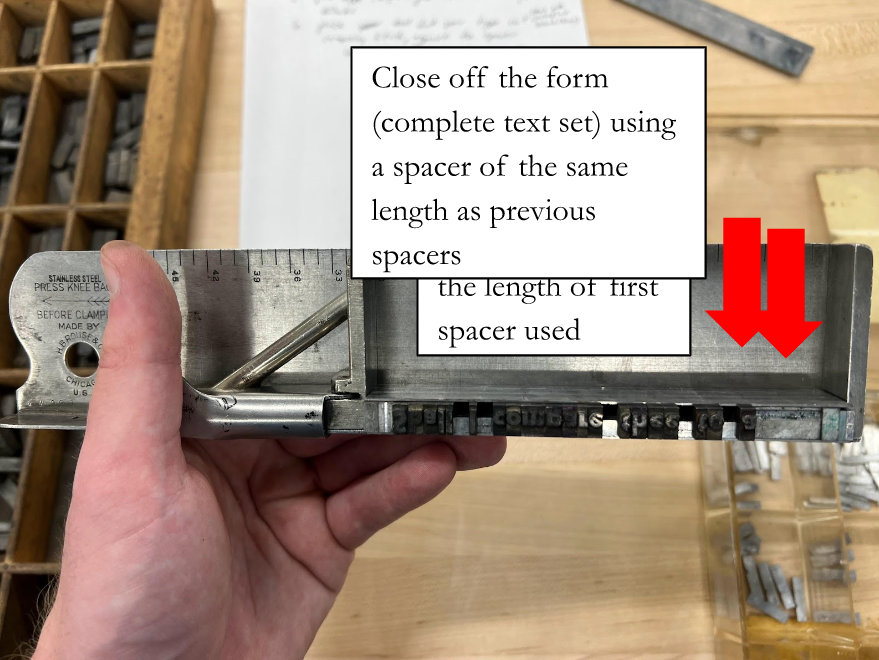
- Once you finish a line of text, fill out the remaining space with buffers

Tip: This is how you set your spacing between lines. Make sure the spacer picked is the same length as the first. | Justin Brown-Ramsey - Place another spacer on top (repeat steps 4 & 5 to add more lines into the form)
Tip: You can use the buffers to center the text or align it as needed. | Justin Brown-Ramsey
Tip: You can use the buffers to center the text or align it as needed. | Justin Brown-Ramsey 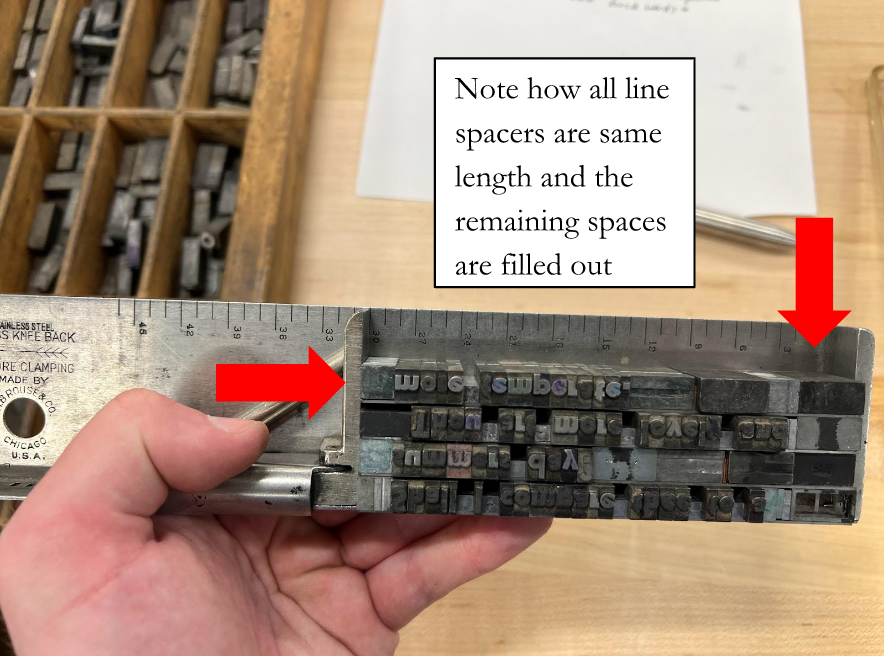
Tip: All of your line spacers should be the same length. The buffers should be used to fill space as necessary. The type should be firm and not have significant give. | Justin Brown-Ramsey
Arranging the Page
- Slide the form off the composing stick into the coffin floor
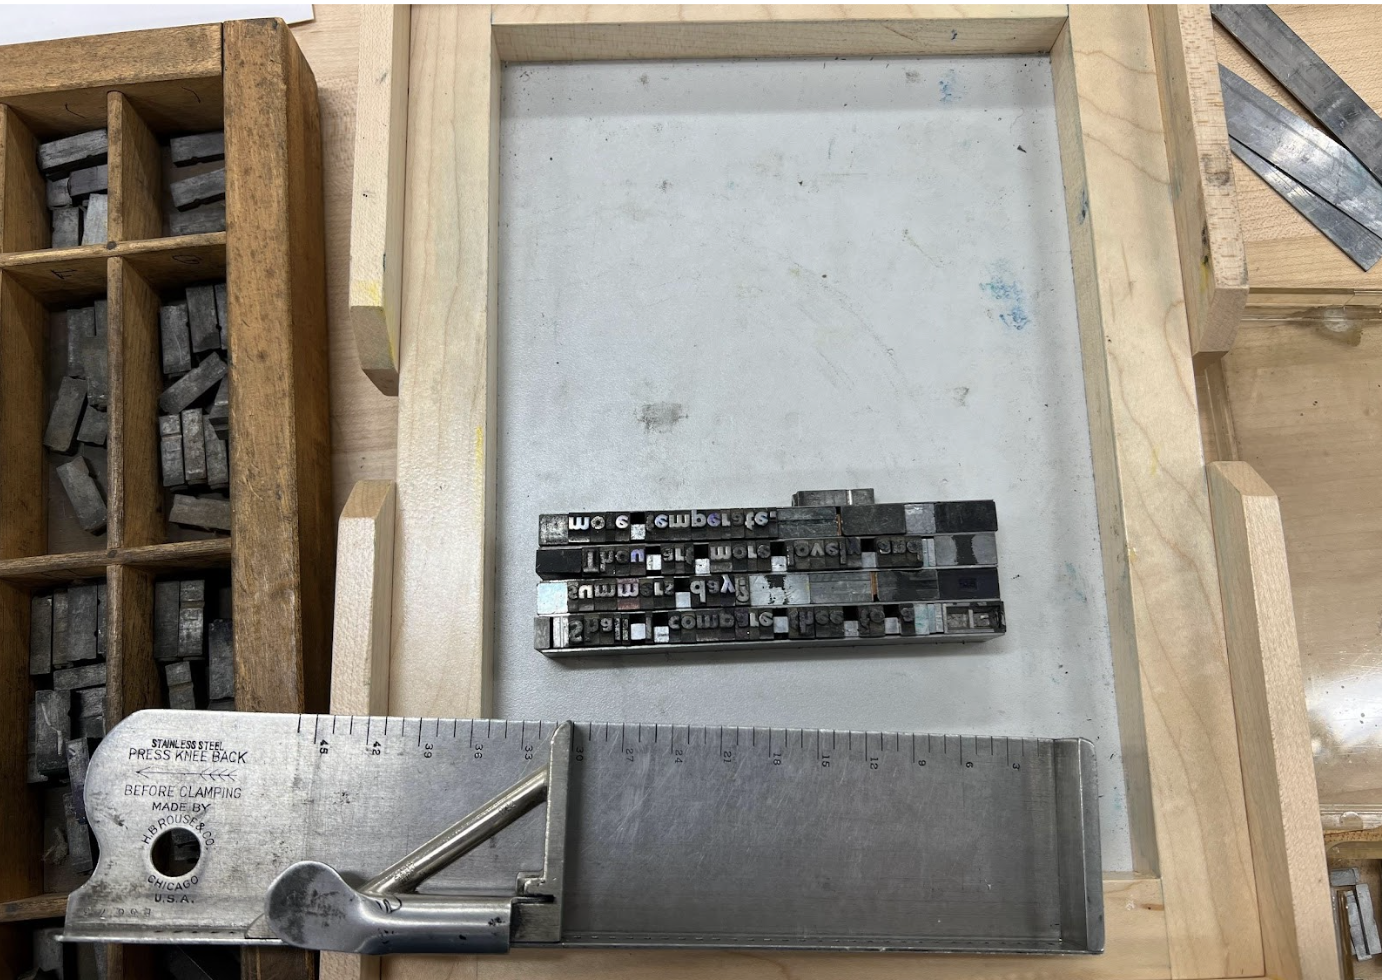
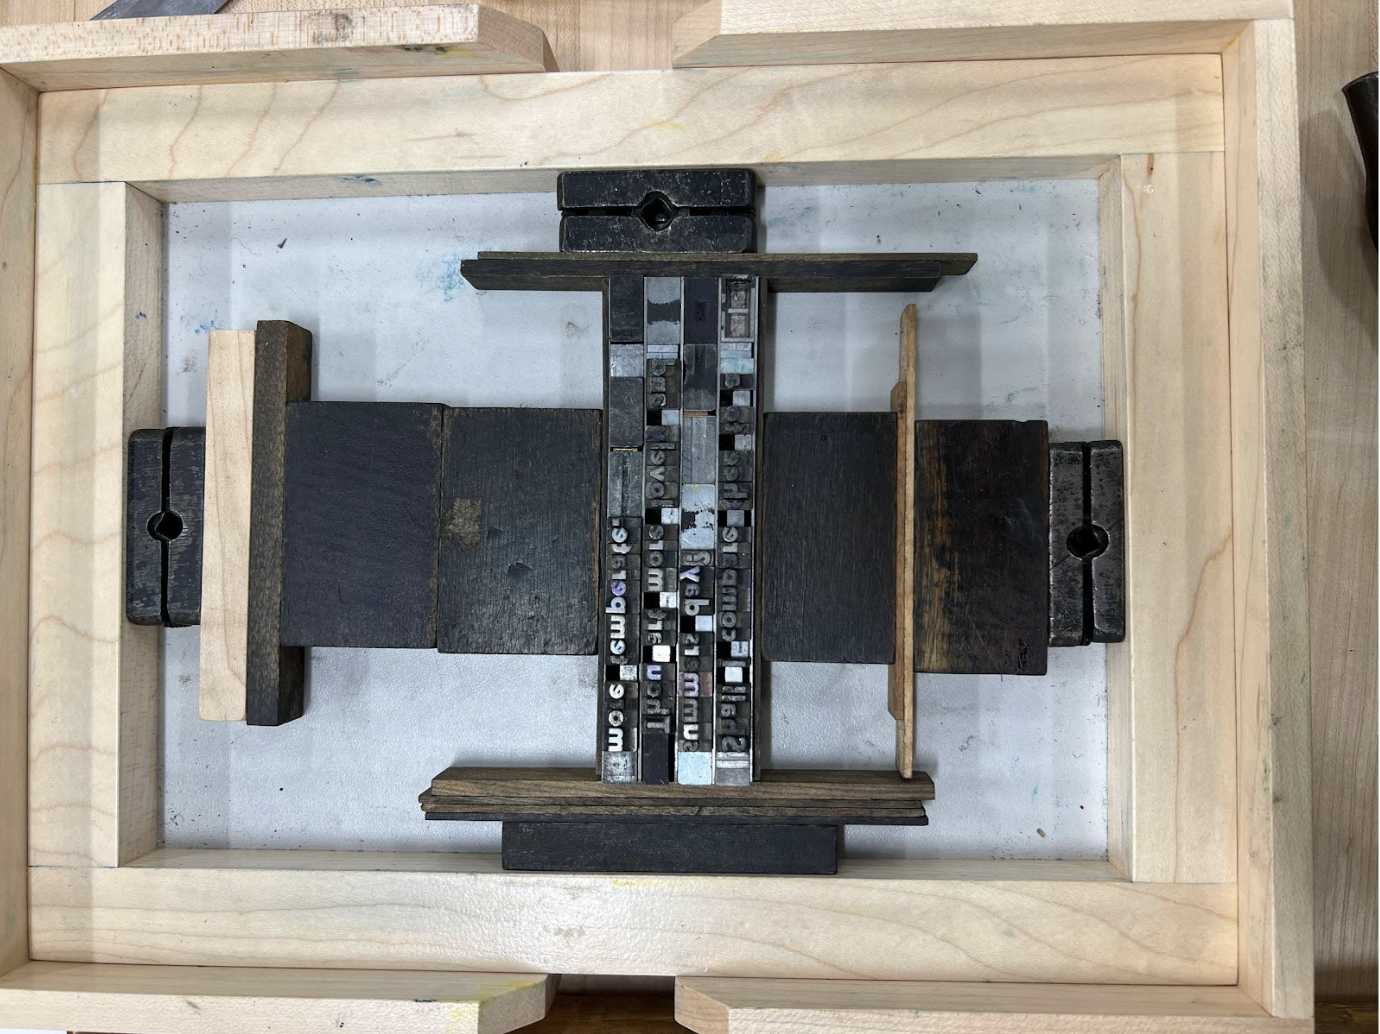
Image depicts the type from the composing stick on the coffin floor. | Justin Brown-Ramsey - Brace two opposing sides of the form in the middle of the coffin floor using wooden furniture and place quoins against the corresponding coffin walls
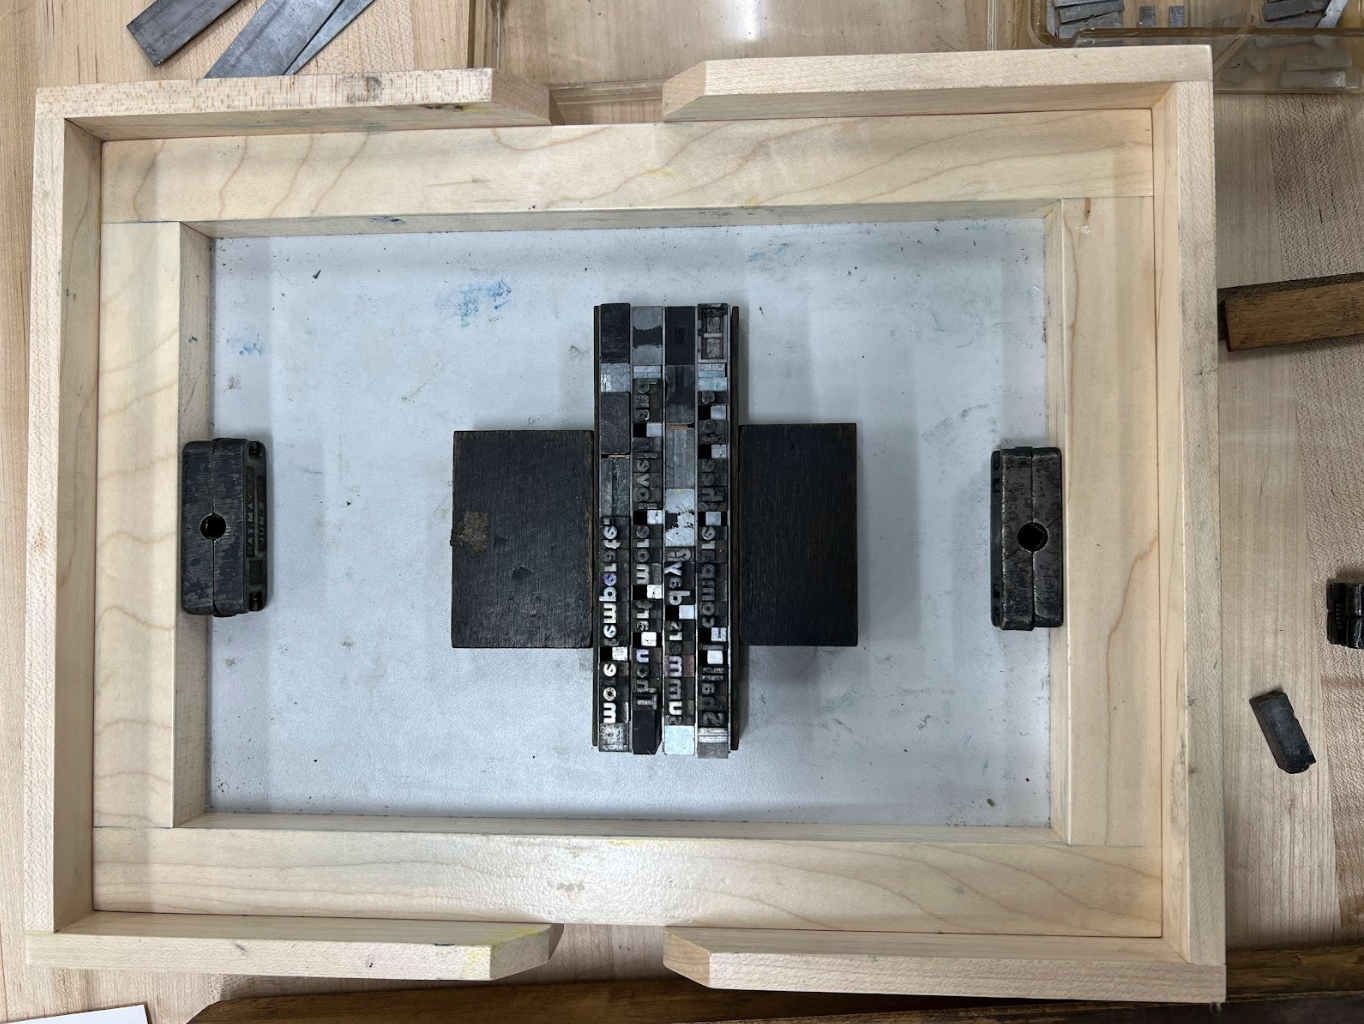
Image depicts braced texts with two quoins. | Justin Brown-Ramsey - Fill in the space between the wooden furniture and the quoins using smaller wooden furniture until the form is tightly secured between the walls.
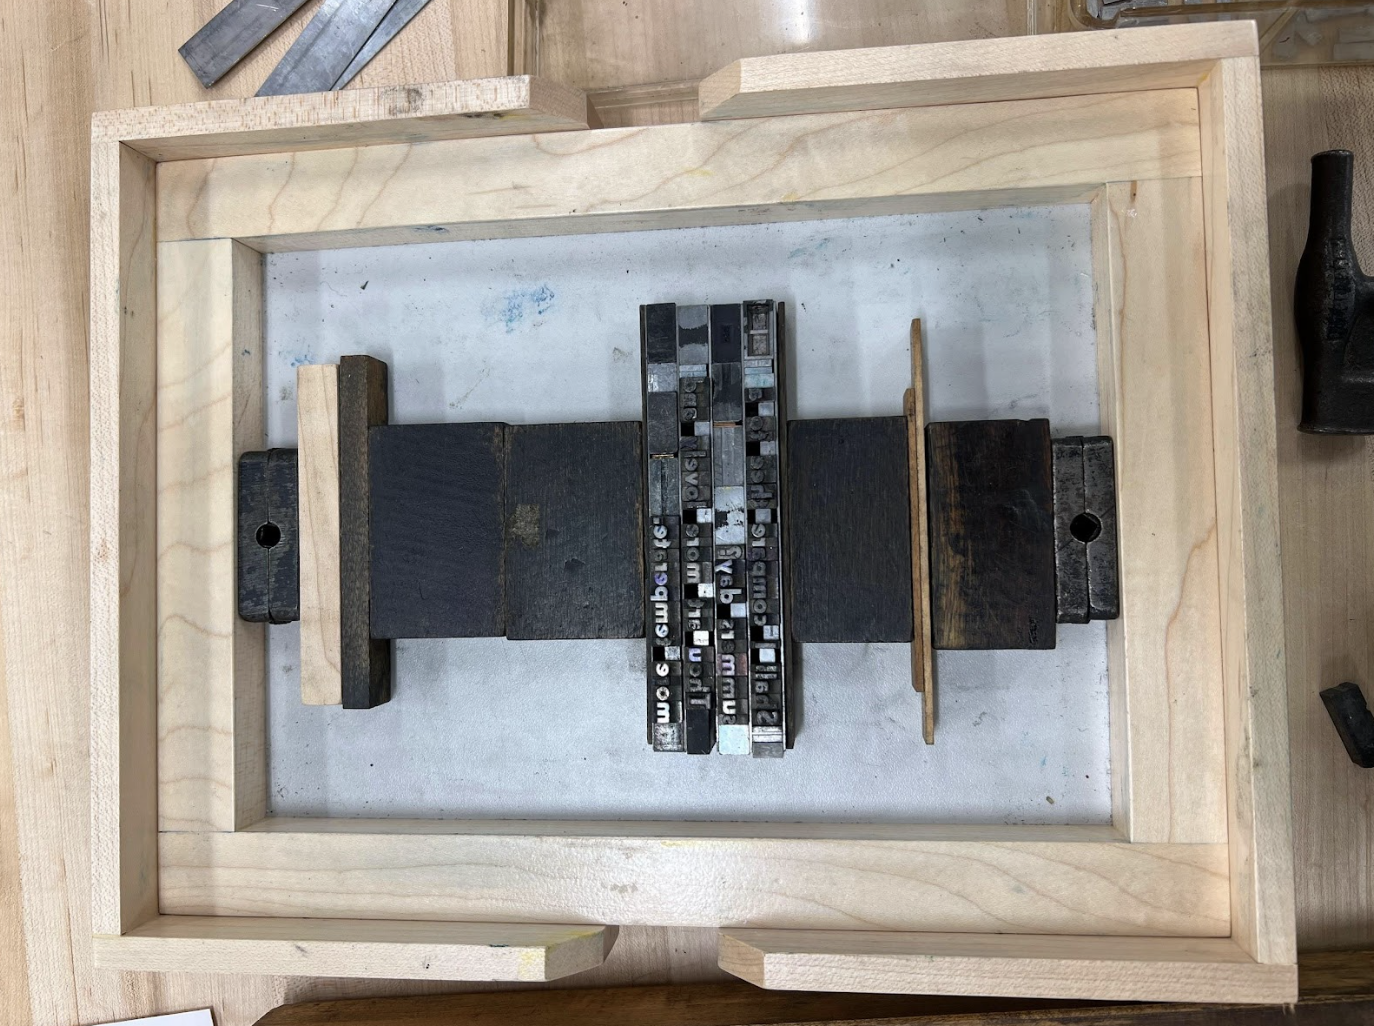
Image depicts appropriate use of furniature. | Justin Brown-Ramsey - Repeat steps 8 & 9 for the remaining pair of sides of the form.
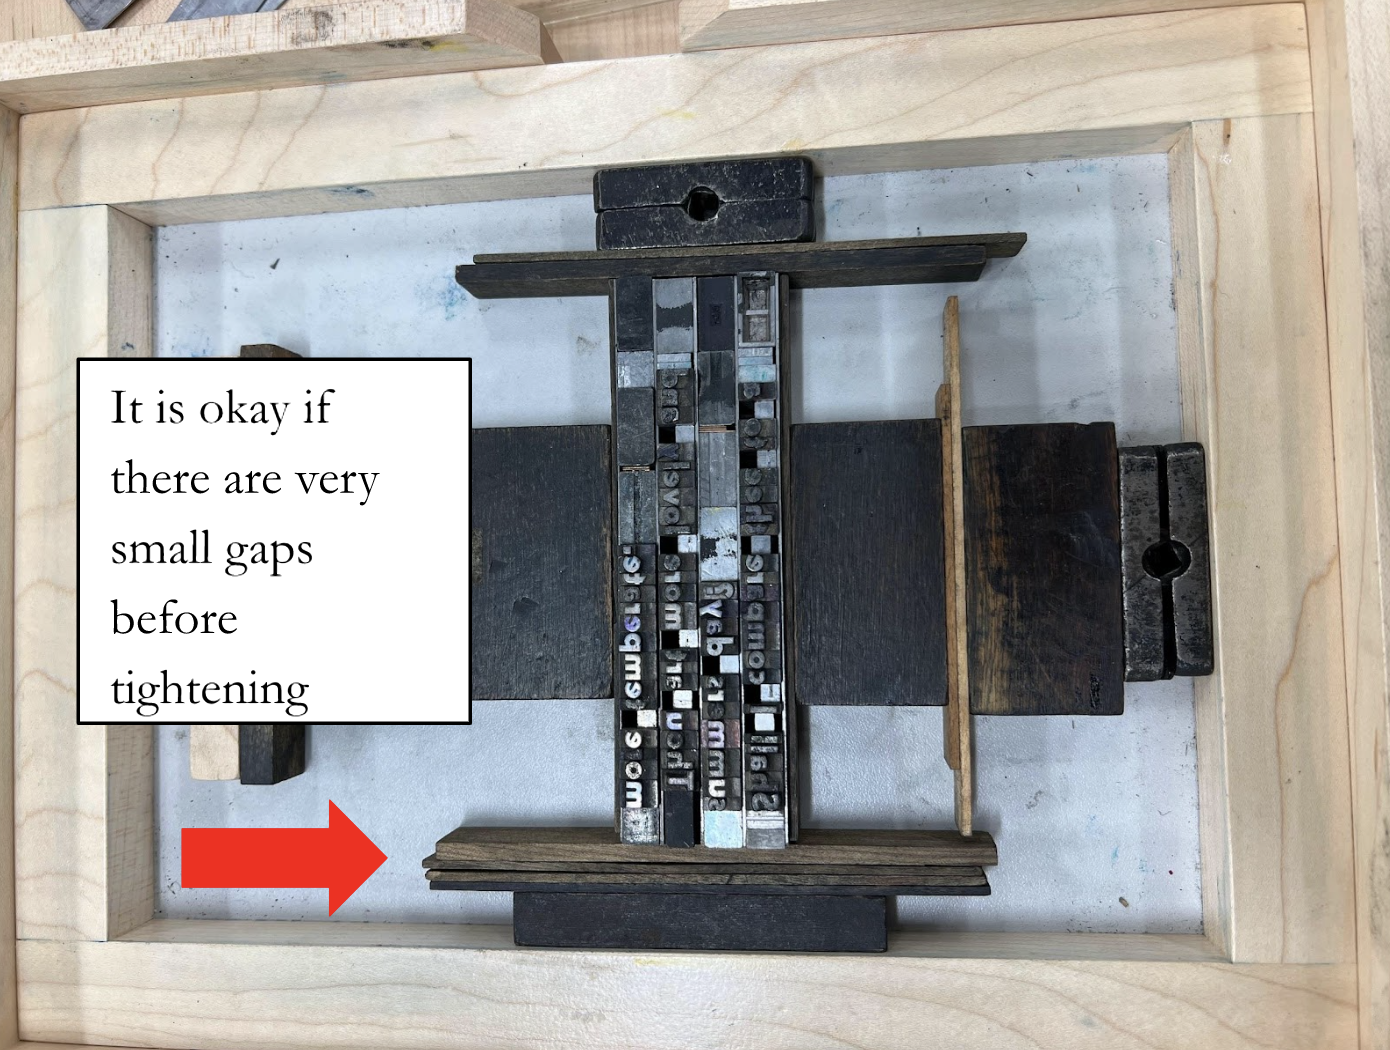
Image depicts acceptable gaps. | Justin Brown-Ramsey - Once the form is snug, tighten the quoins using the quoin T-tool (always tighten slowly and tighten opposing pairs of quoins - do not go around clockwise or counterclockwise)
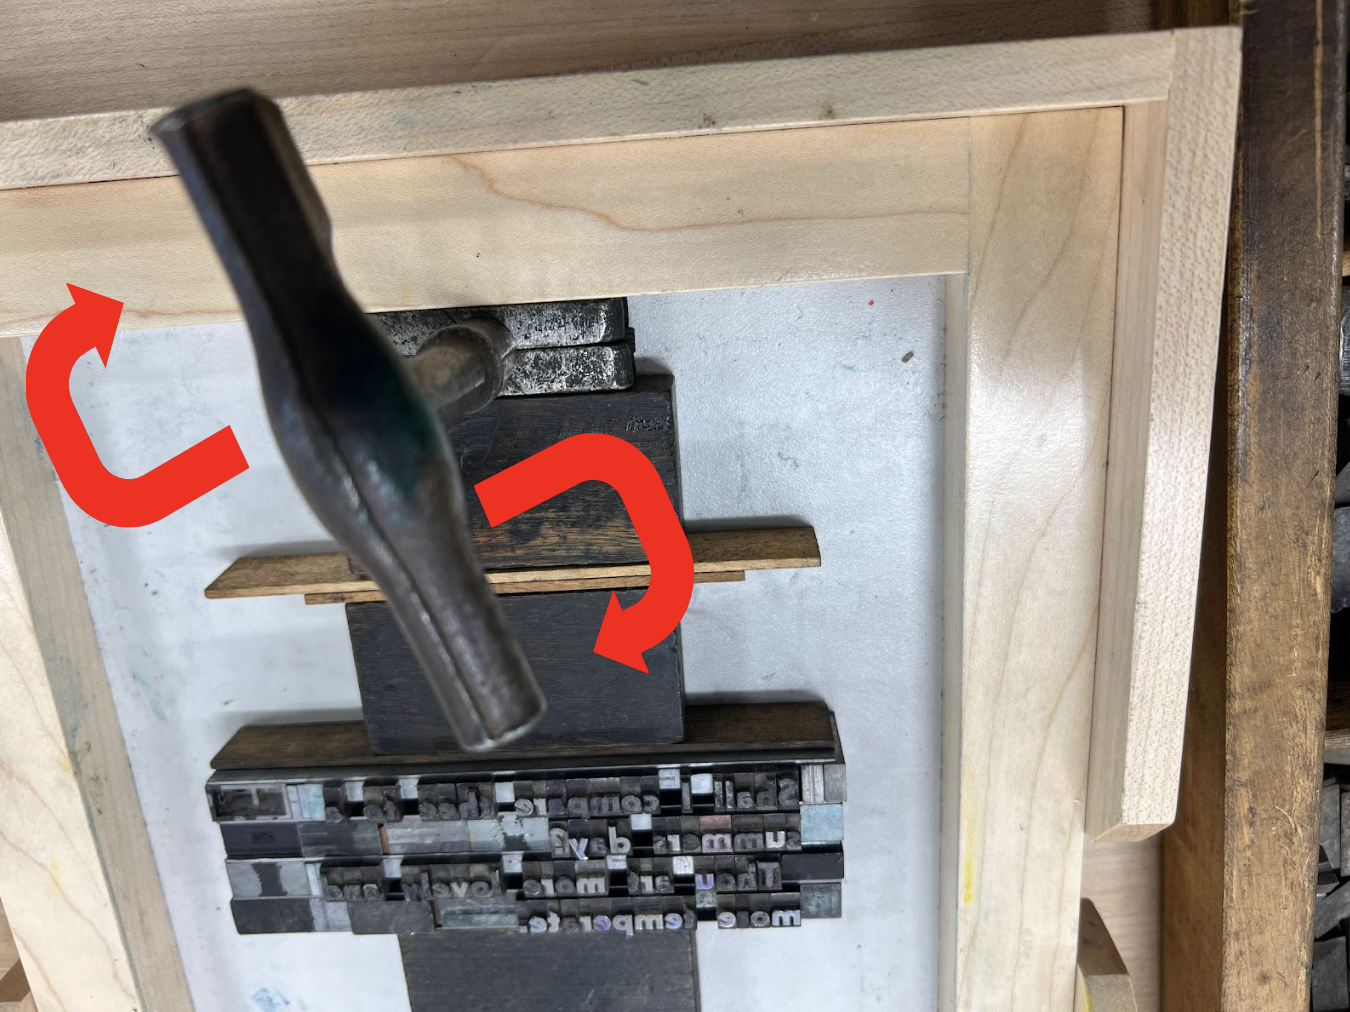
Depiction of how to tighten quoins. | Justin Brown-Ramsey 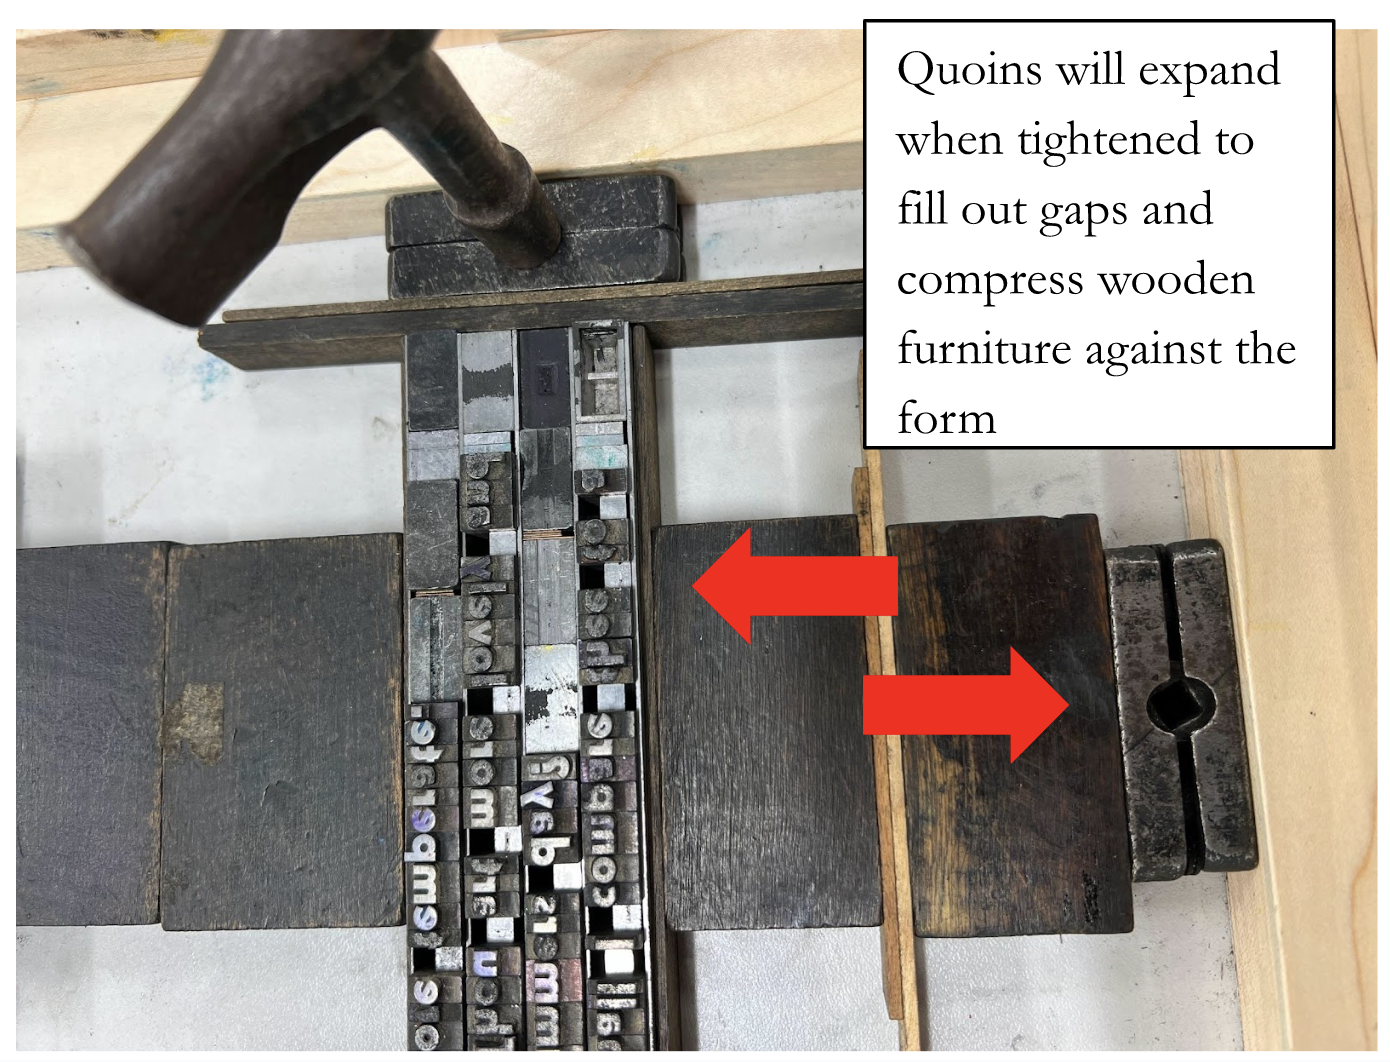
Quoins expand when tightened. | Justin Brown-Ramsey
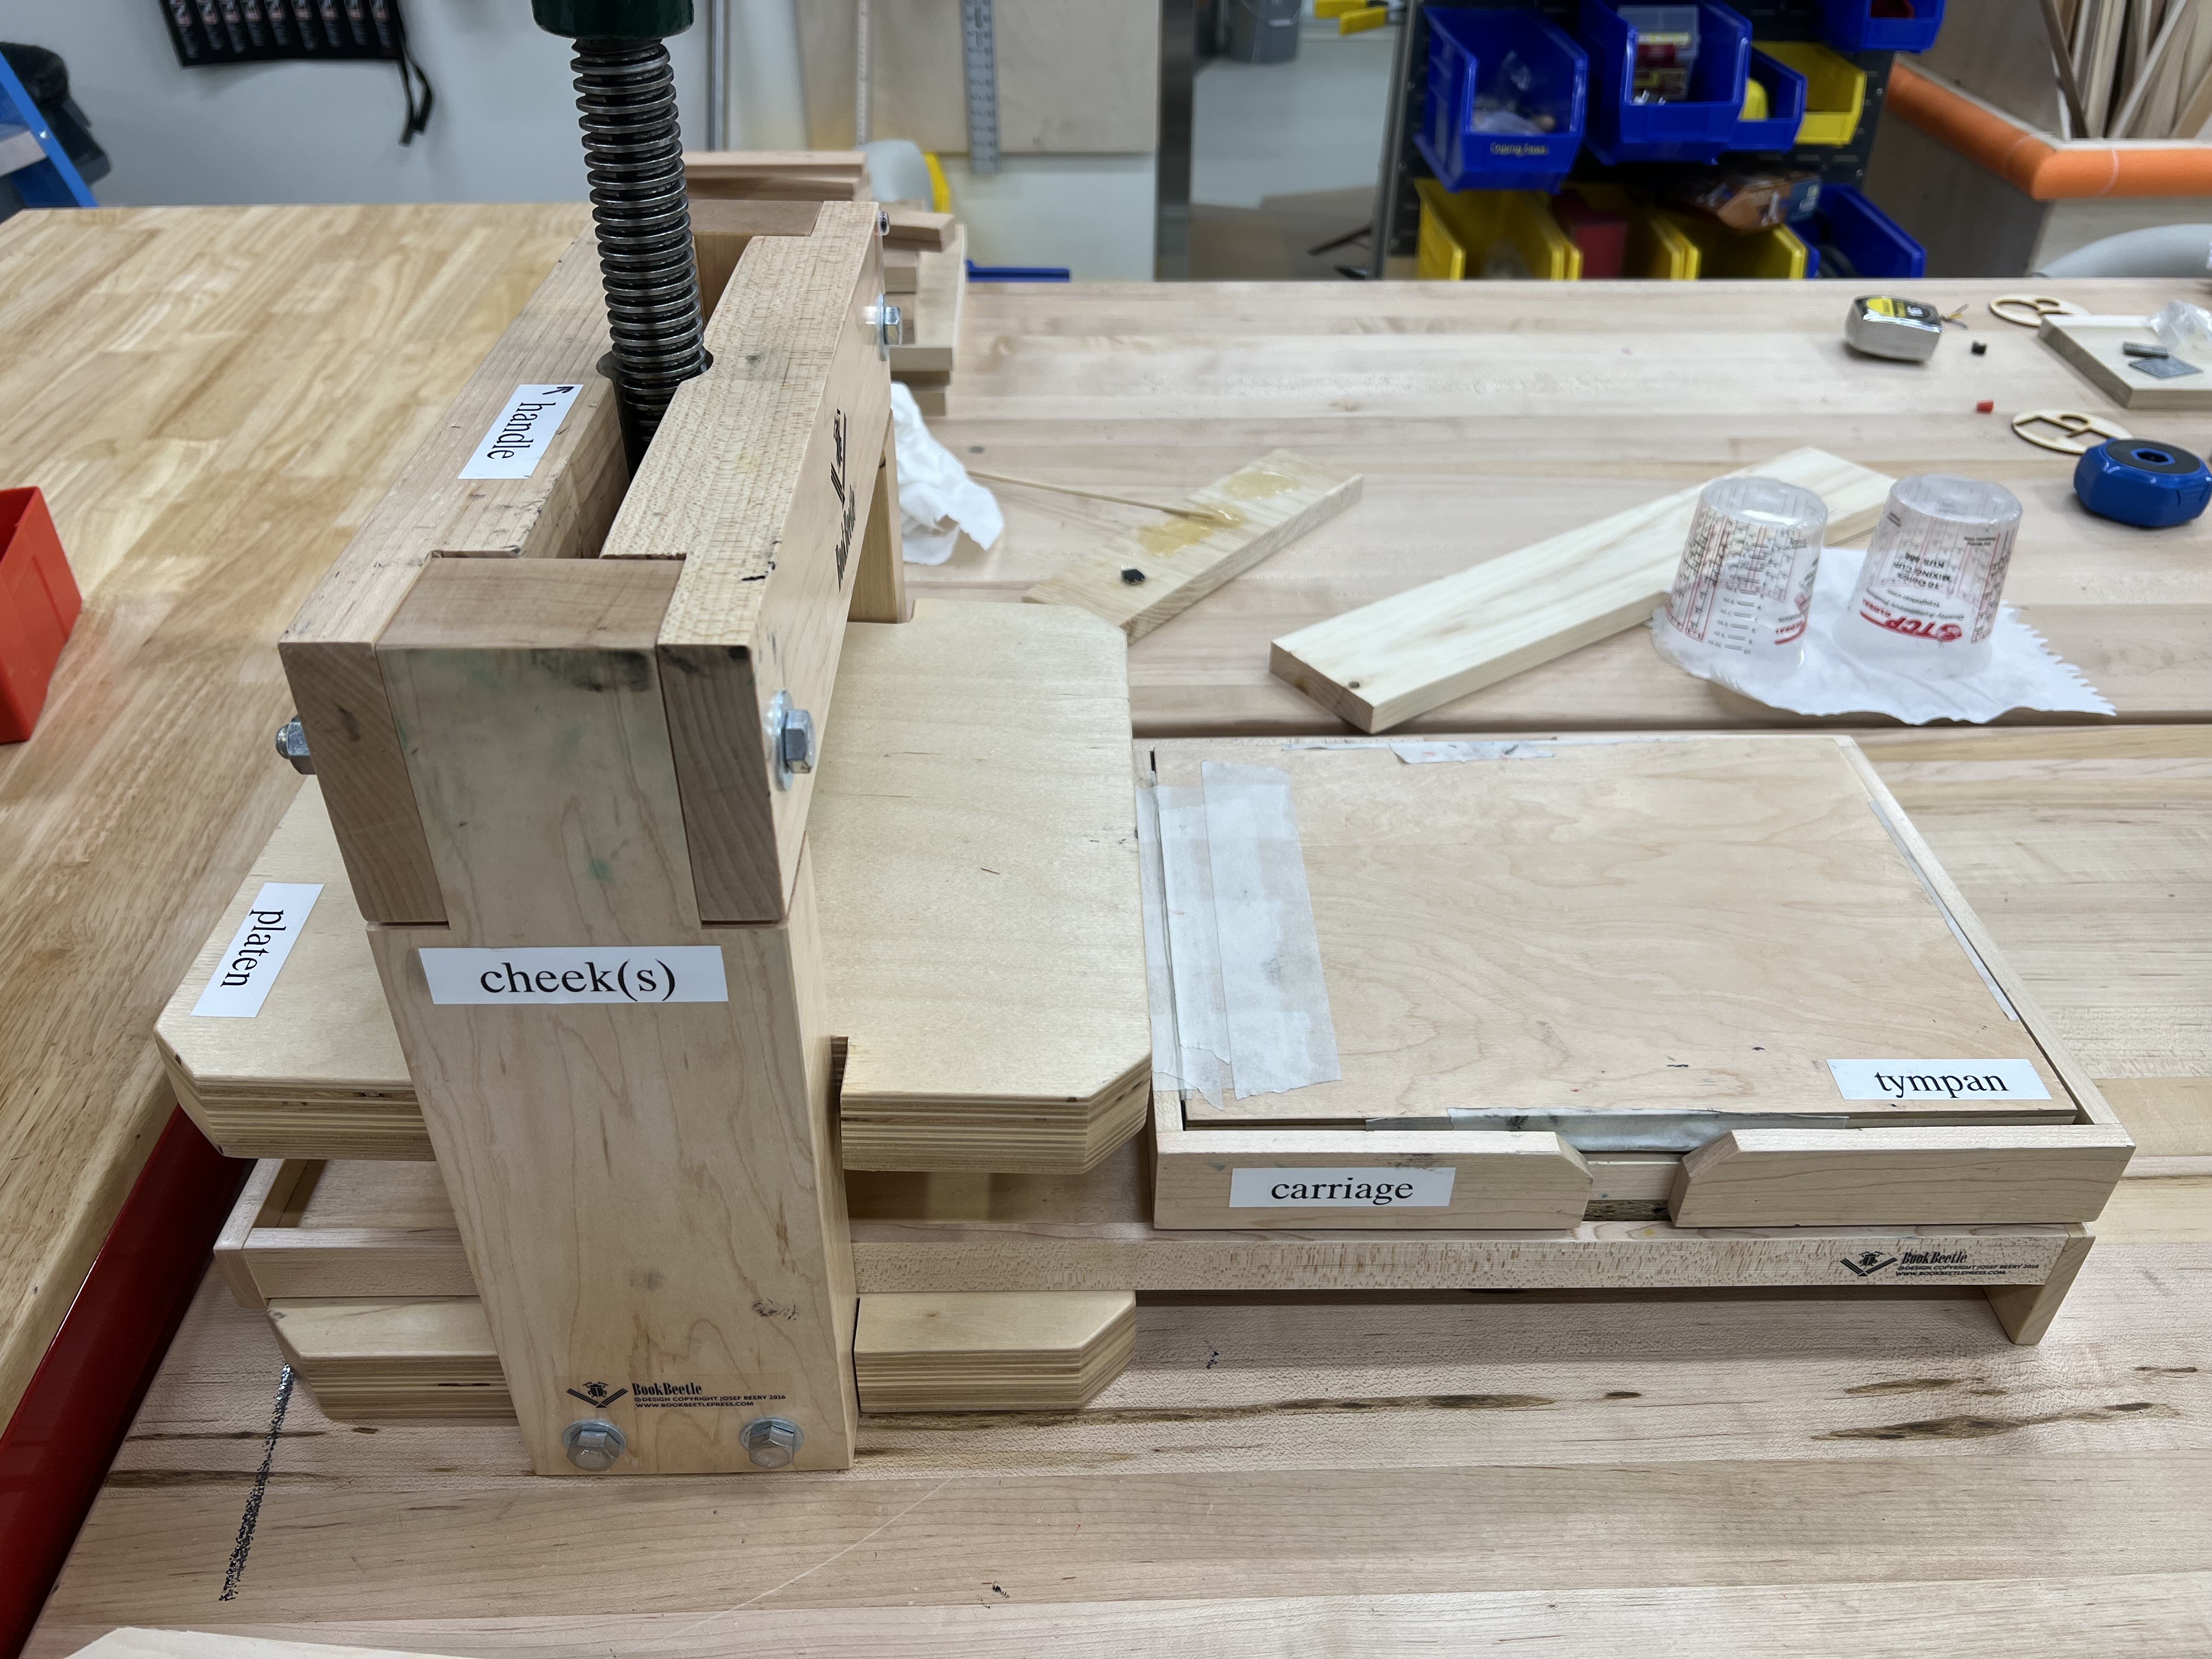
Using the Press
- After securing the form, place the carriage into the bed of the printing press
Quoins expand when tightened. | Justin Brown-Ramsey 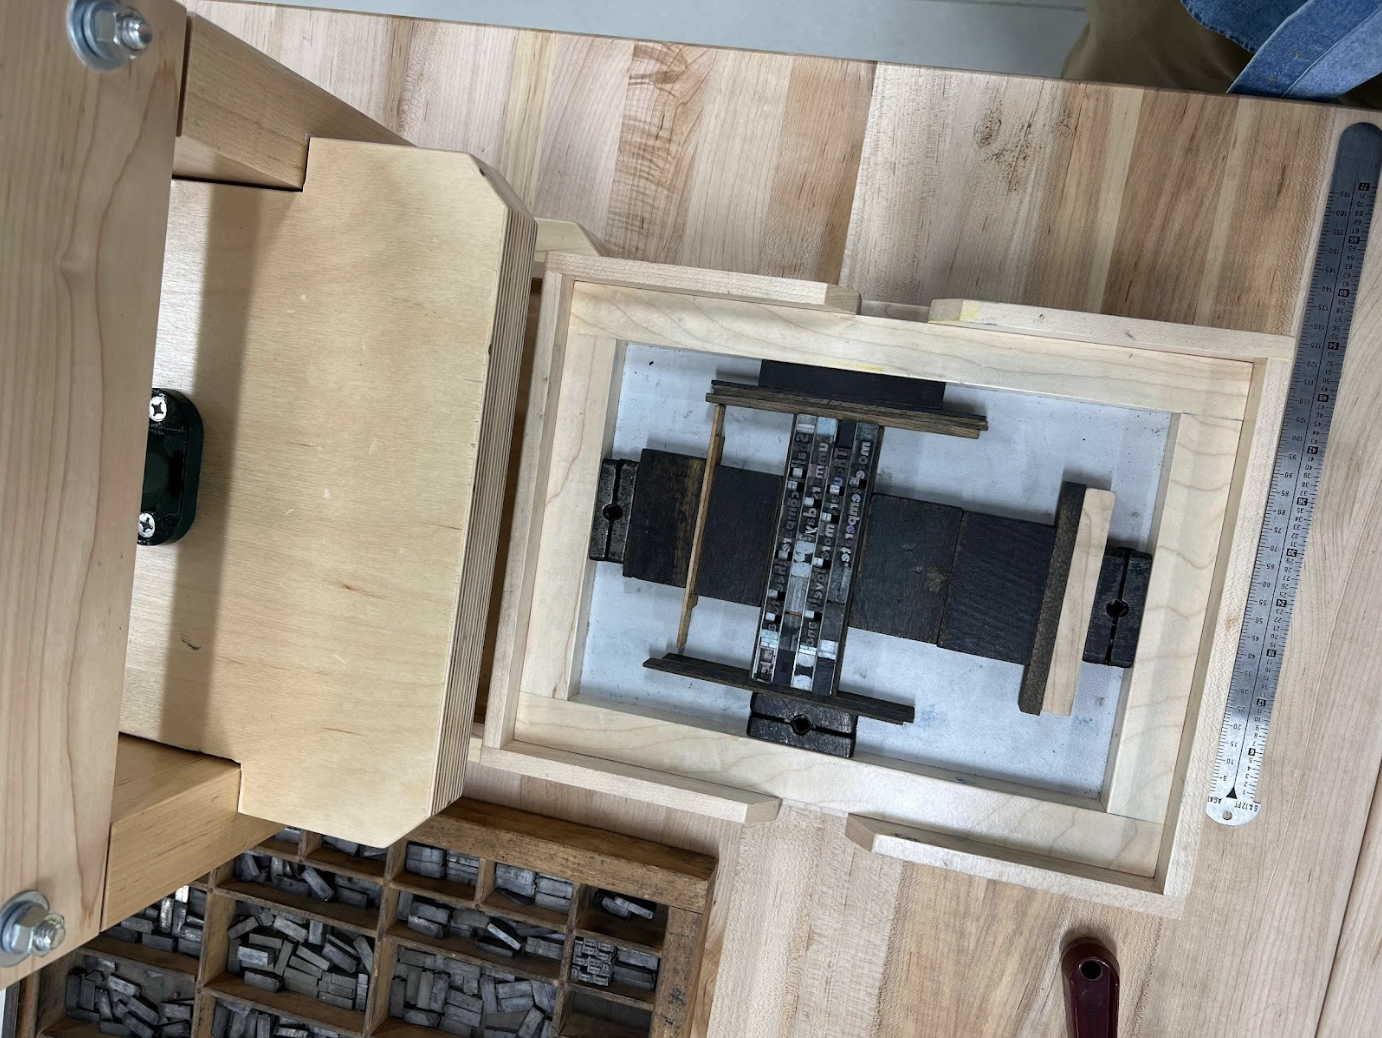
Quoins expand when tightened. | Justin Brown-Ramsey - Using an ink roller or ink ball, apply the ink, being sure to thoroughly and evenly cover the typeface
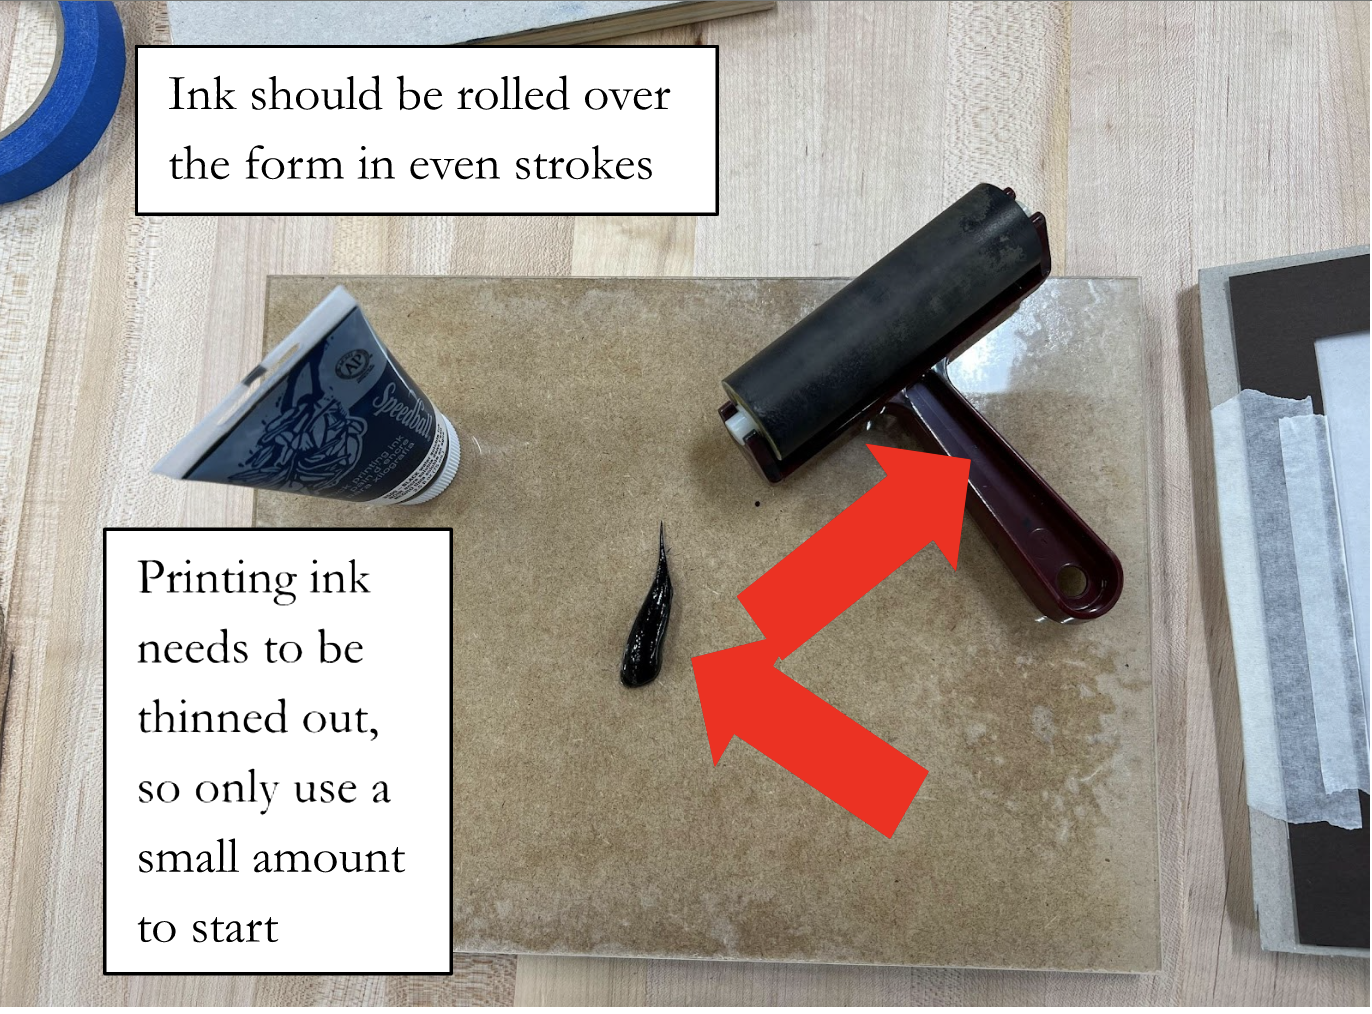
Tip: Ink needs to be thinned. Only use a small amount. | Justin Brown-Ramsey 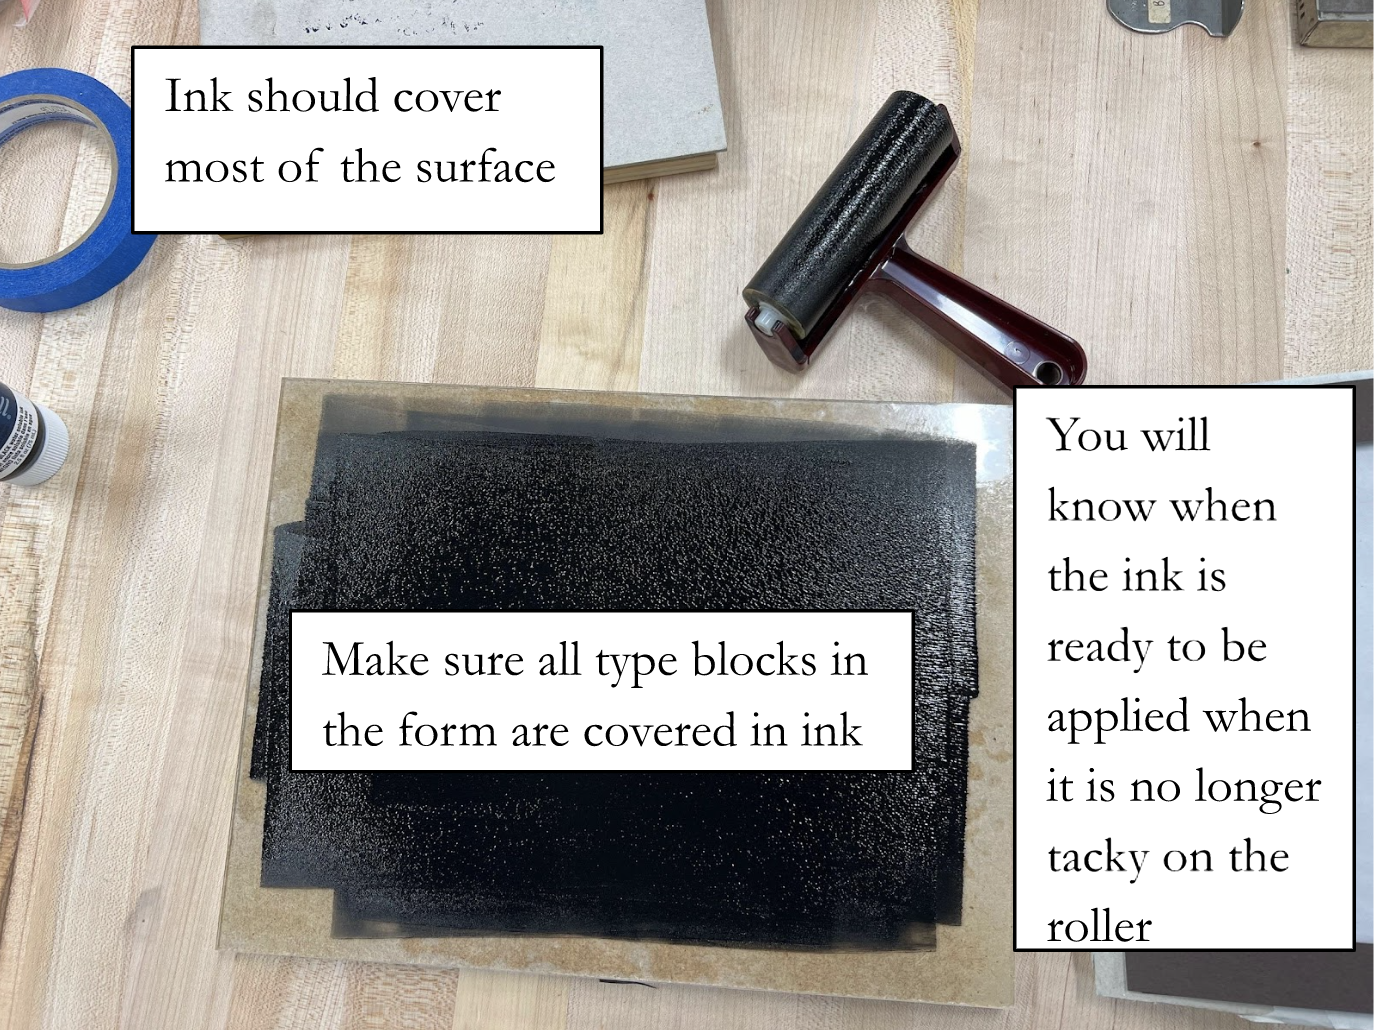
Tip: Ink should be spread using the roller to be even and thin. | Justin Brown-Ramsey 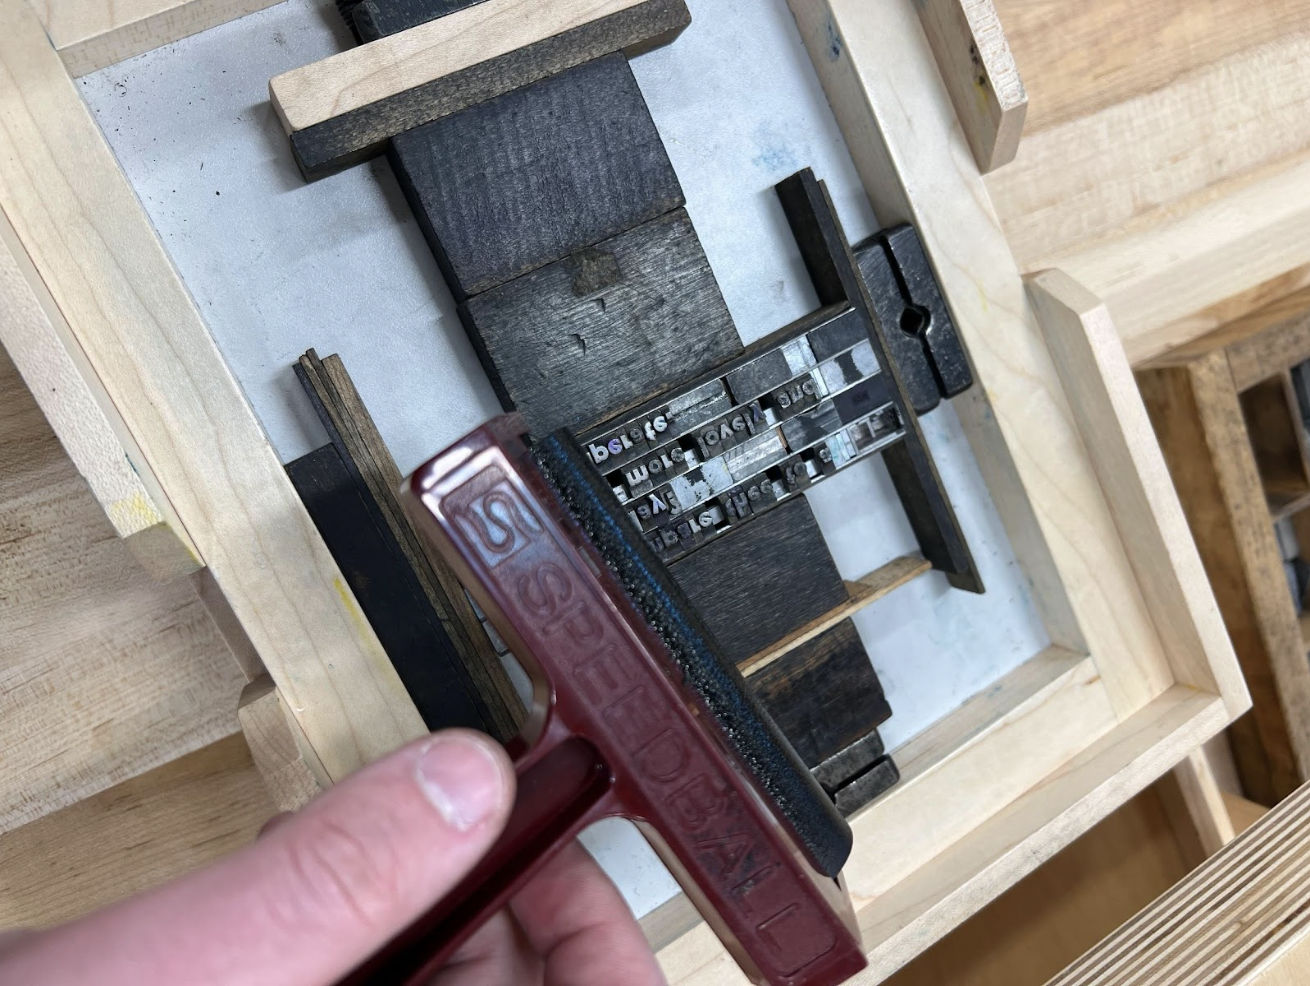
Image shows ink on roller before application on type.| Justin Brown-Ramsey 
Image shows amount of ink spread on type. | Justin Brown-Ramsey - Lift up the frisket from the tympan
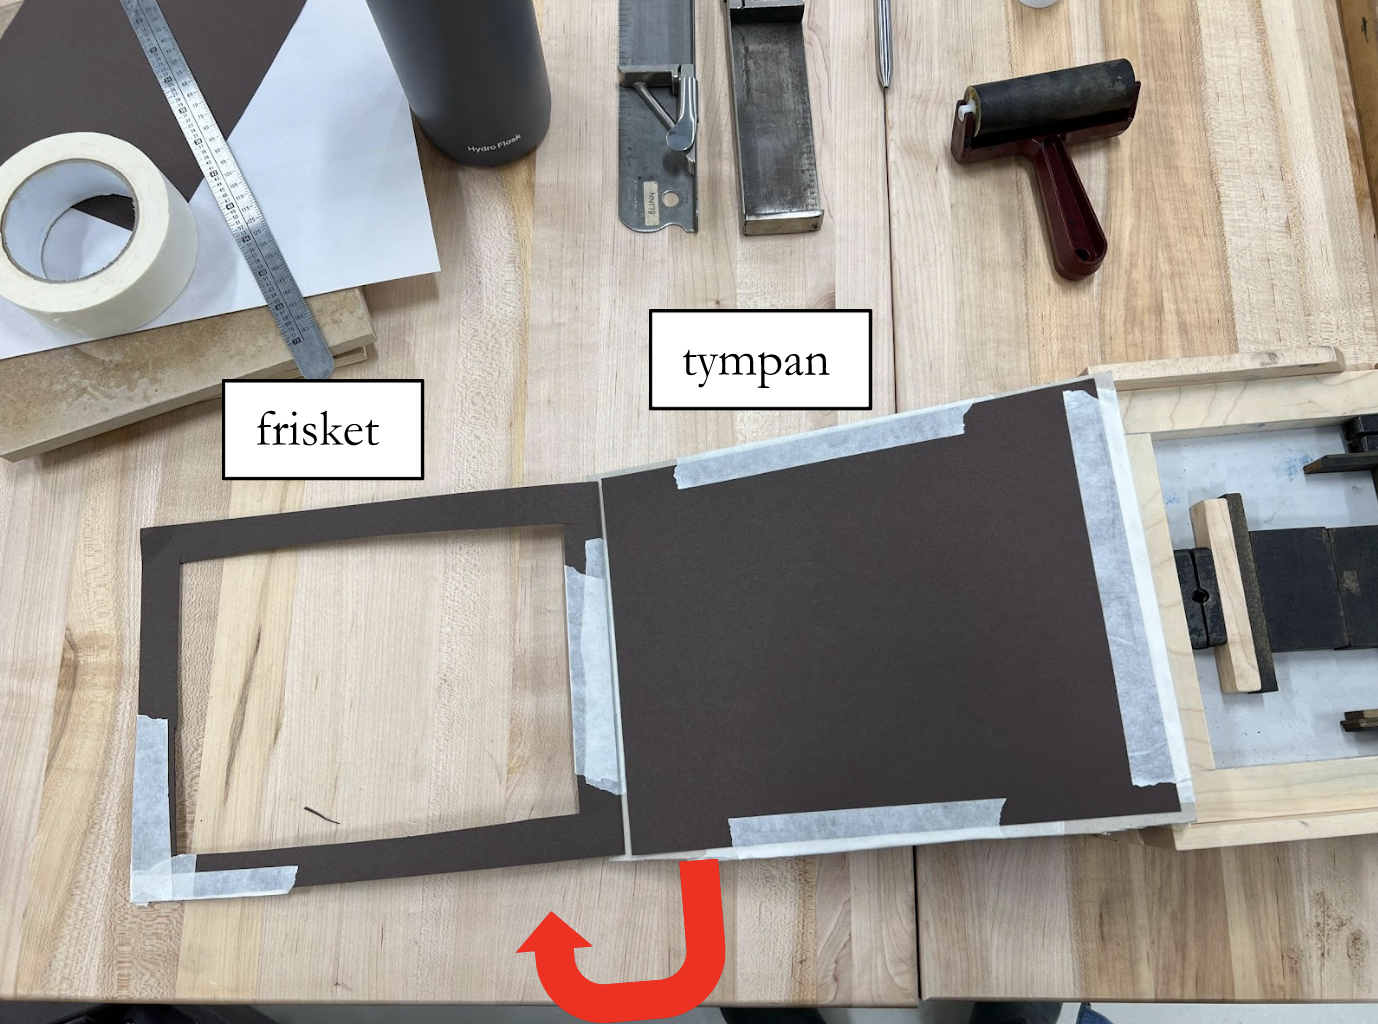
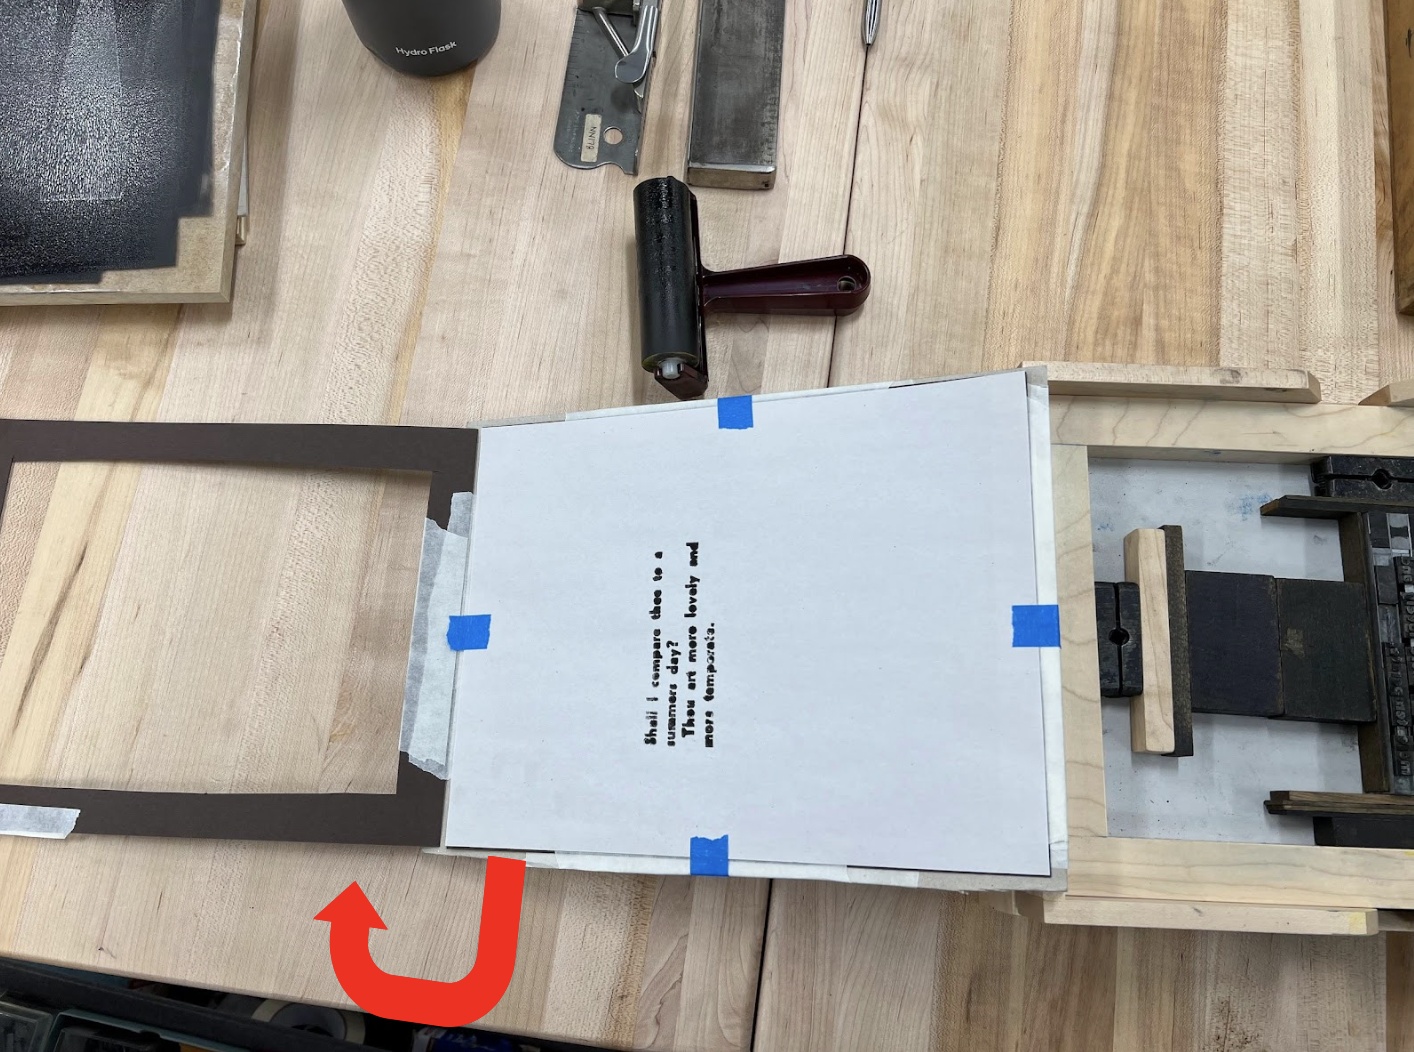
Image depicts frisket and tympan. | Justin Brown-Ramsey - Place paper on tympan and secure with [tape, clasps, points, etc.]
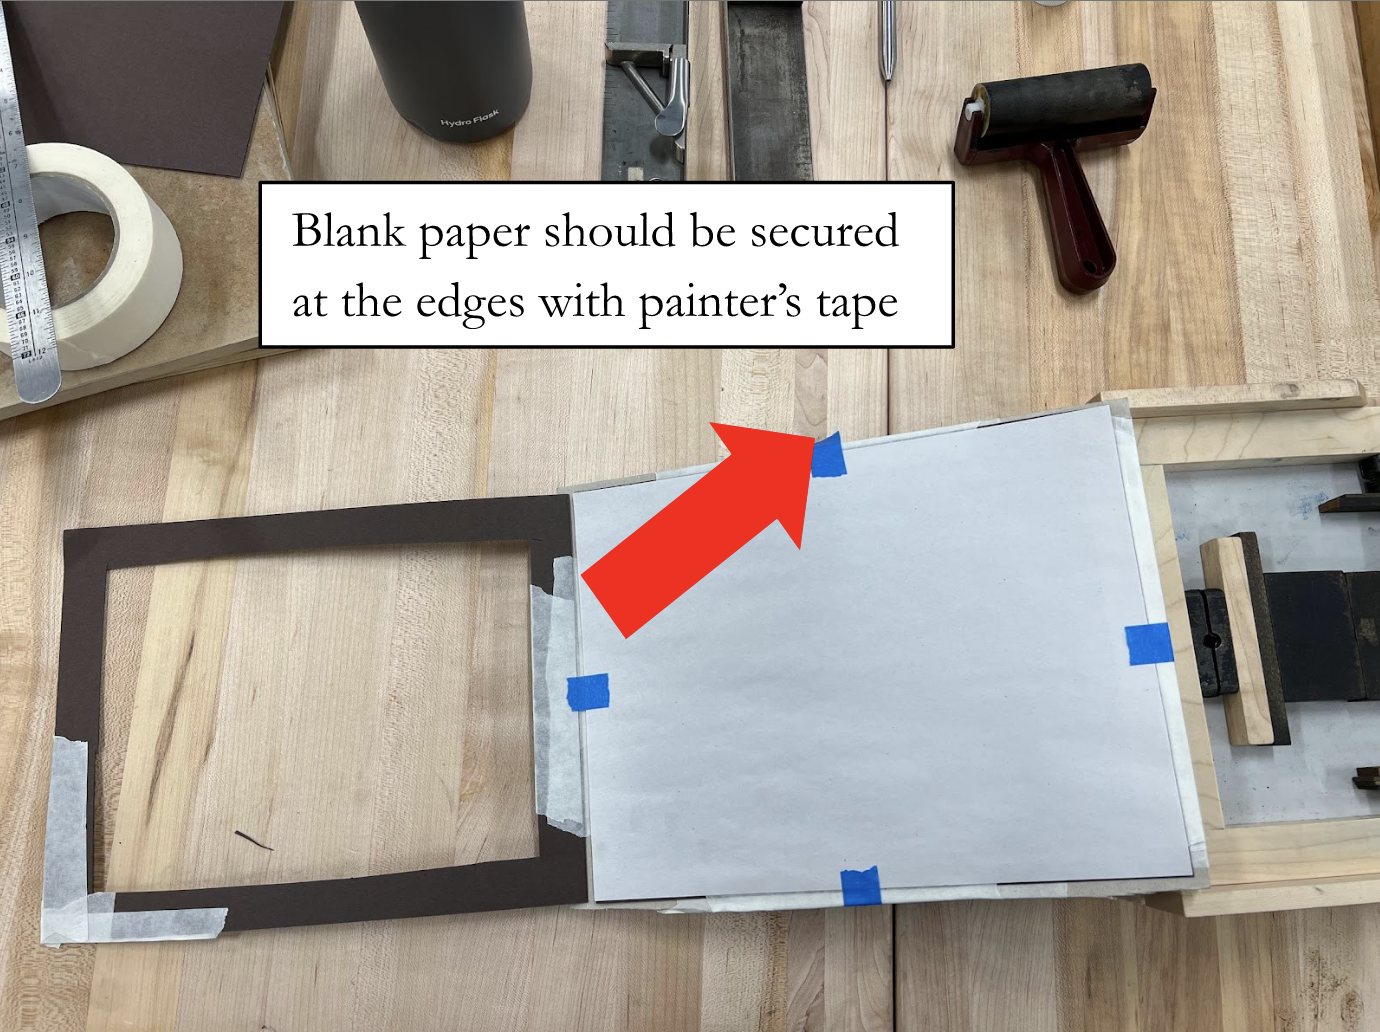
Tip: Make sure to use a good amount of tape - but not enough to tear the paper. | Justin Brown-Ramsey - Lay down frisket back onto tympan, making sure window is properly aligned (paper visible)
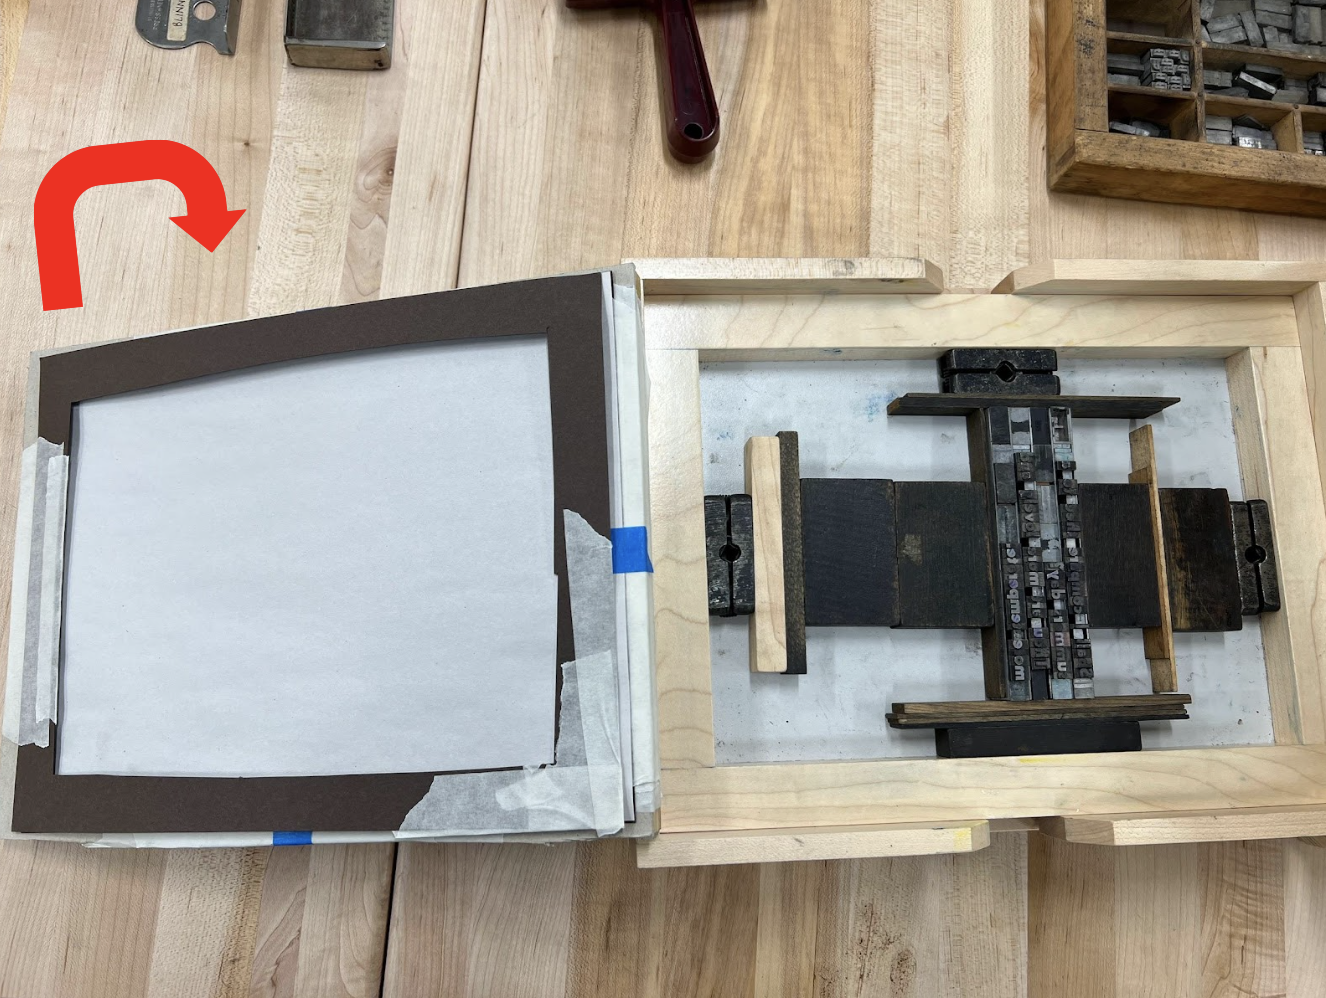
Tip: Make sure to use a good amount of tape - but not enough to tear the paper. | Justin Brown-Ramsey - Close the tympan back onto the coffin
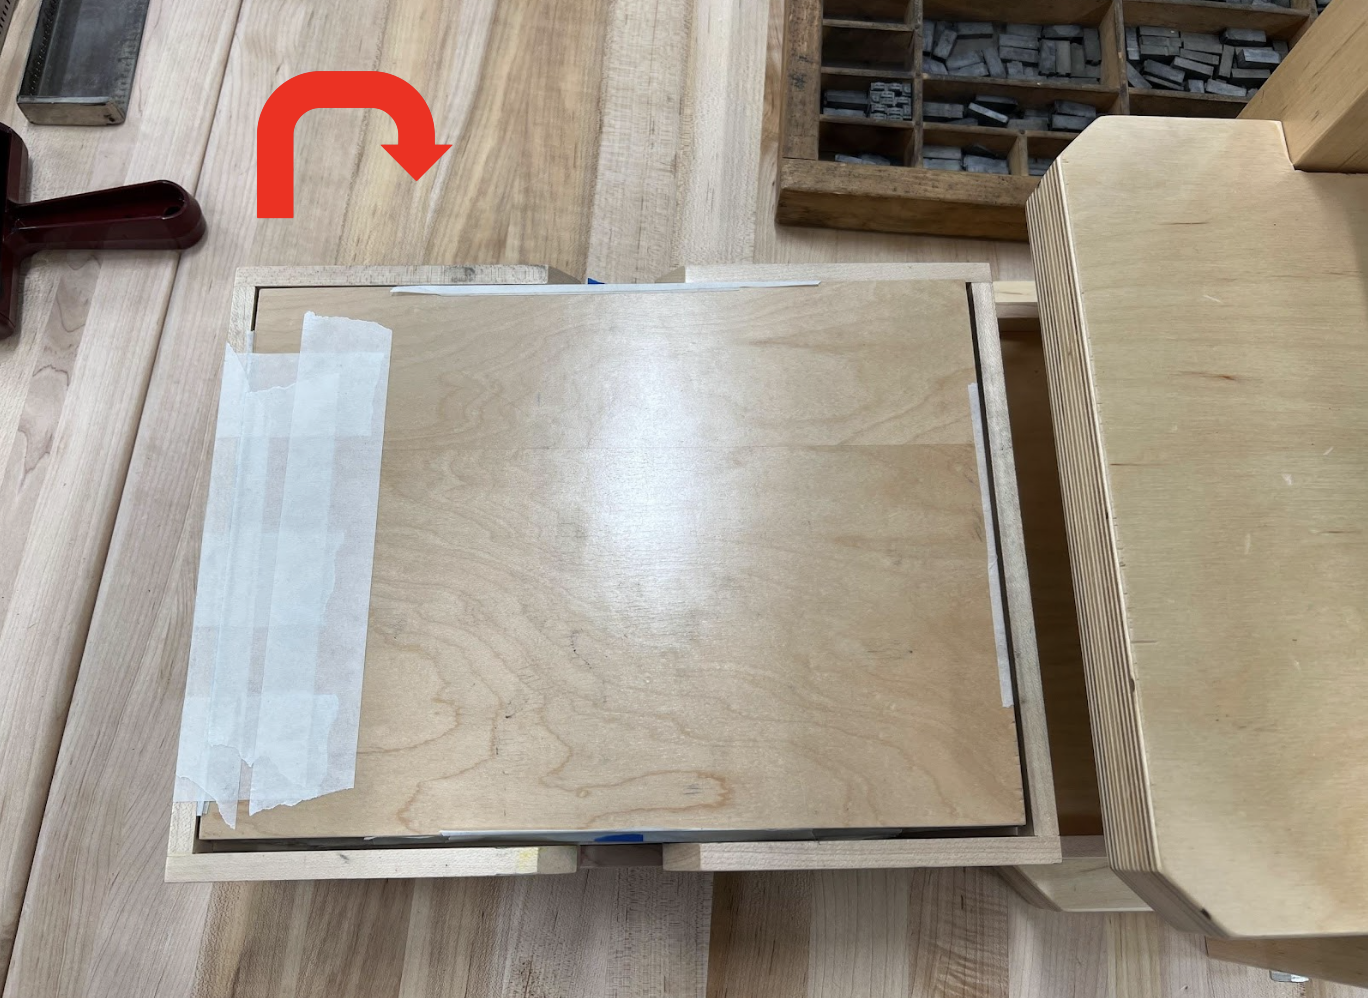
Justin Brown-Ramsey - Slide carriage forward on the bed, directly under the platen
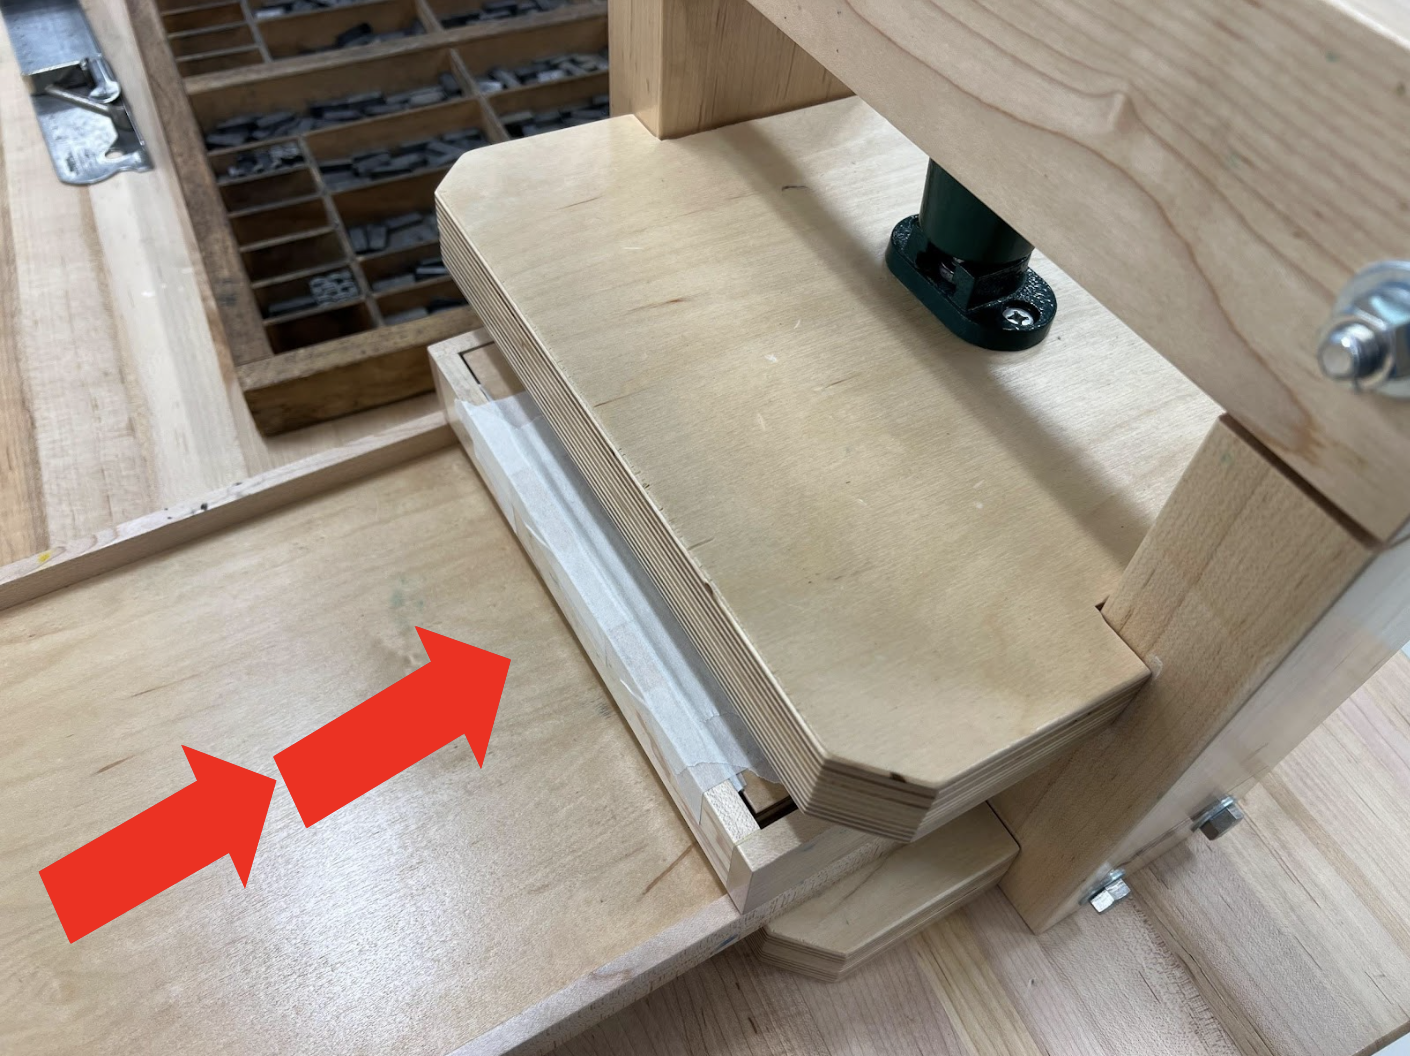
Justin Brown-Ramsey - Turn the handle clockwise, moving platen down to contact the tympan and press platen gently onto tympan, pushing paper onto inked typeface blocks
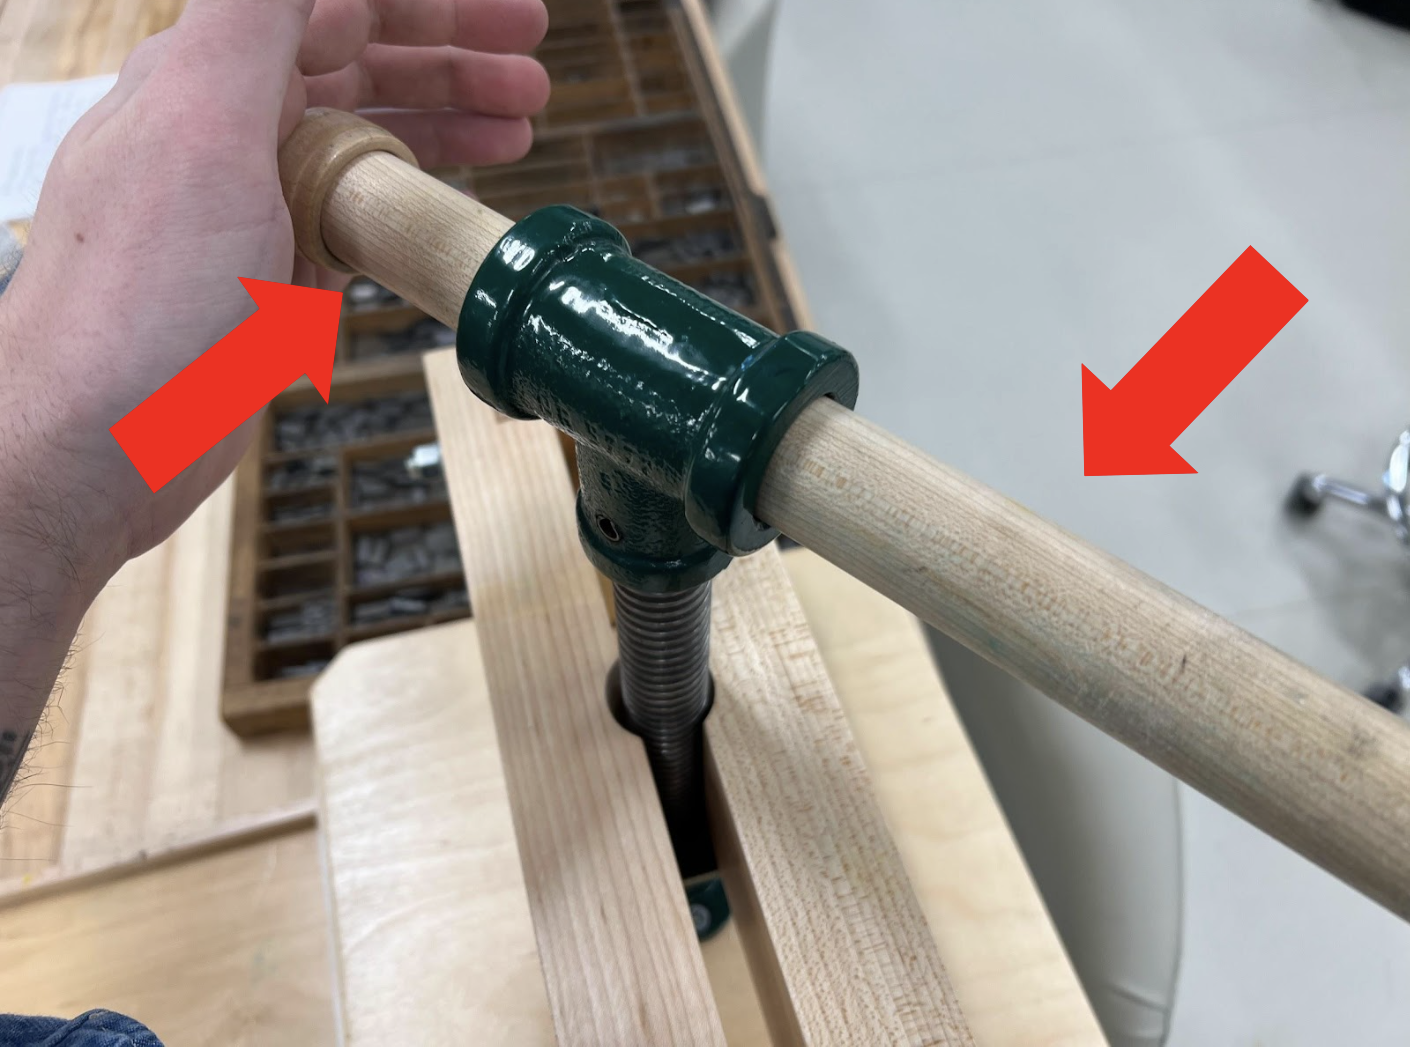
Justin Brown-Ramsey - Turn handle counter-clockwise to raise platen out of contact with tympan
- Slide carriage backward towards the legged end of the bed, out from underneath the platen
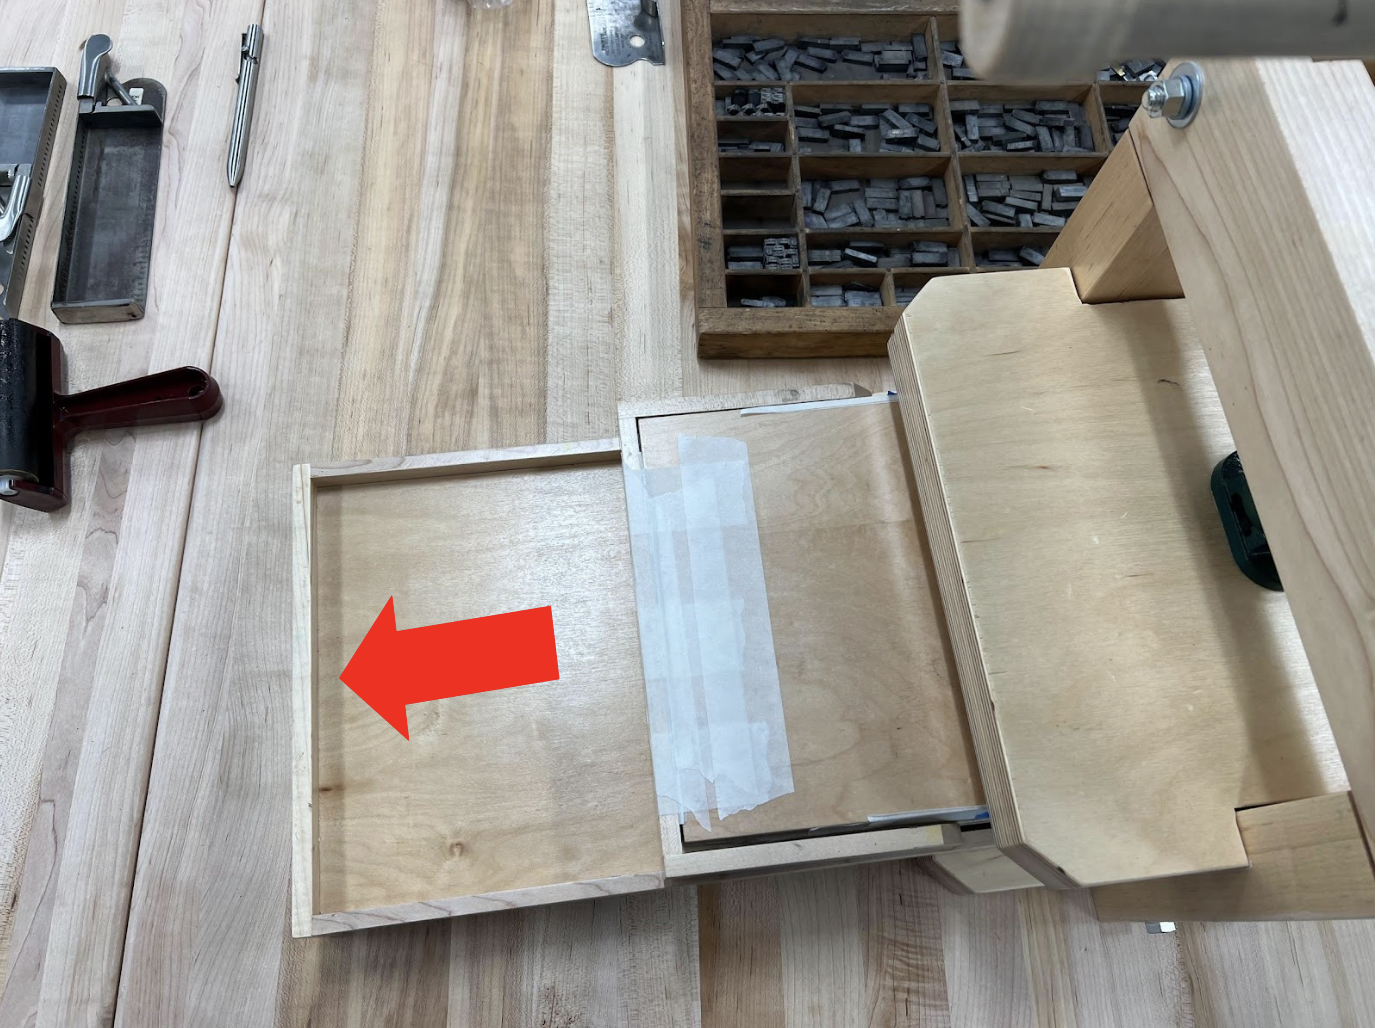
Justin Brown-Ramsey - Lift tympan from coffin, exposing typeface
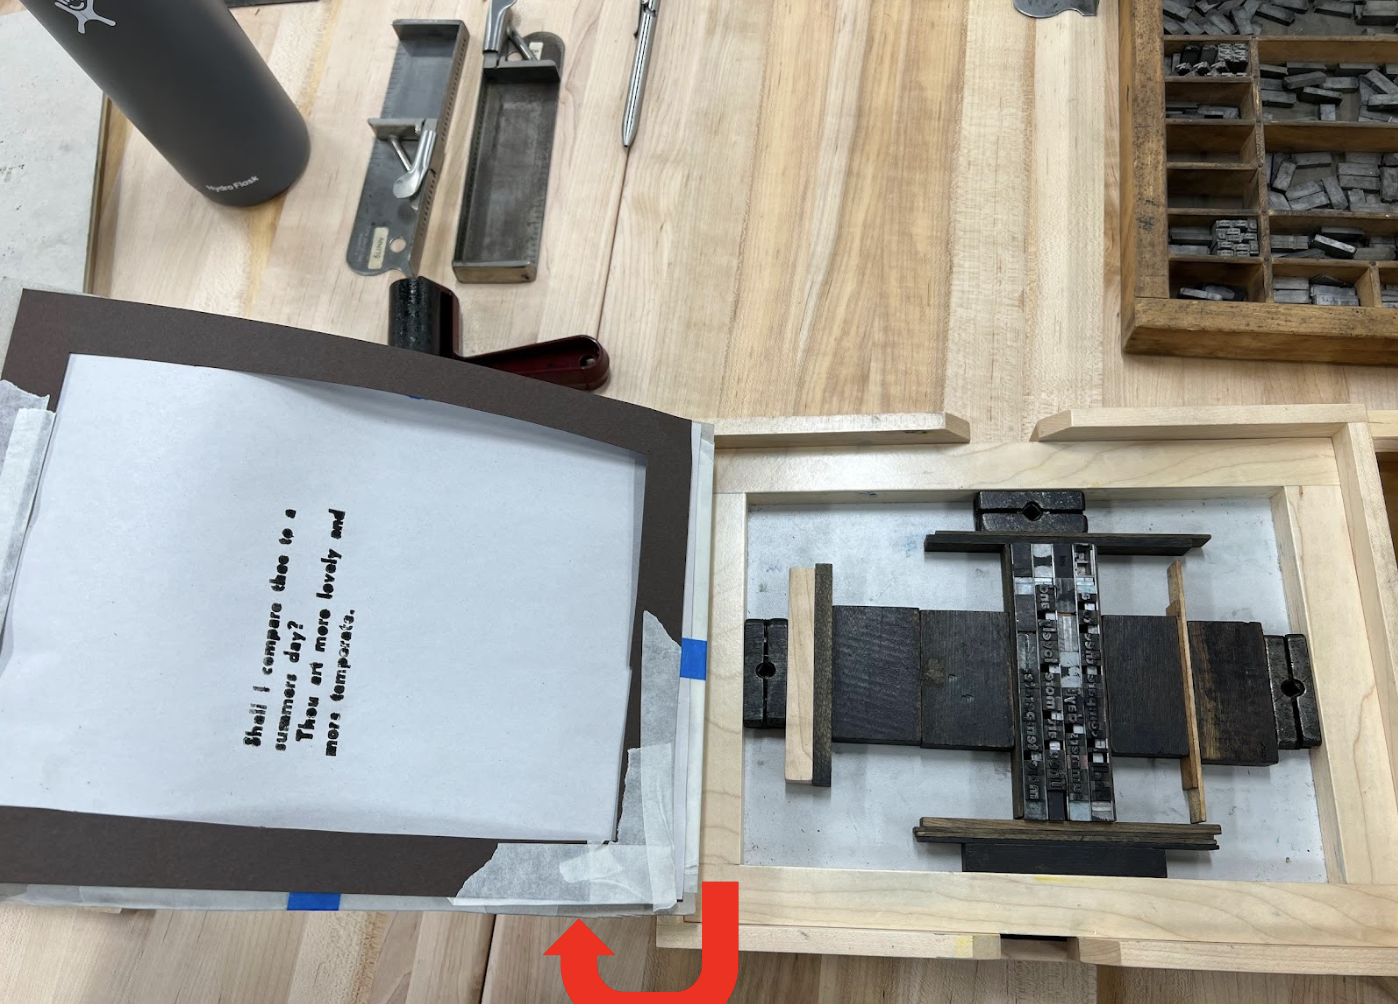
Justin Brown-Ramsey - Lift frisket from tympan
Justin Brown-Ramsey - Remove paper from tympan and hang it to dry
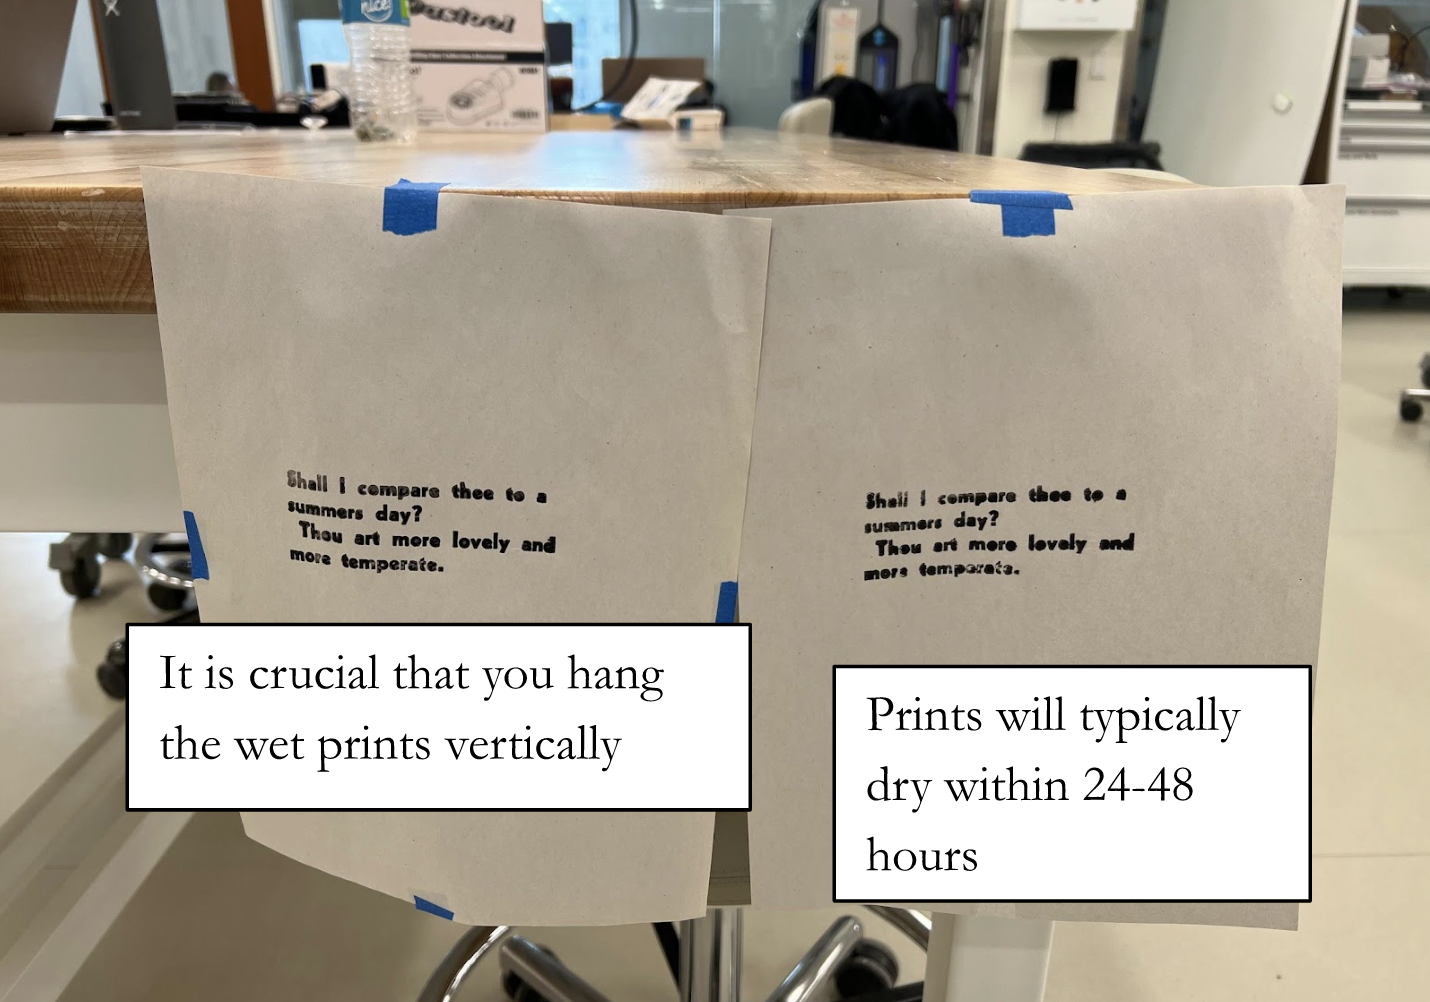
Justin Brown-Ramsey